Pre-Configuration
Prior to using this guide, please ensure you have completed all set-up components detailed in this article.Configuring Connector in PEX
Log into your PEX account to finalize the set up.- Log in to http://dashboard.pexcard.com/
- Navigate to Apps > Available
- Scroll to locate PEX Connector for Aplos.
- Click More info > Install > Launch.
Note:To install the connector, you need to enable the following permissions: Edit business settings & apps, Manage cardholder, View card transactions. You can enable them in My Profile -> Permissions.
Select your use case(s)
There are currently two options for how you can connect PEX with Aplos. We recommend as many as possible to make your reconciliation experience seamless.- Auto create vendor cards from my Aplos contact list.
- Sync transactions from PEX to Aplos nightly.

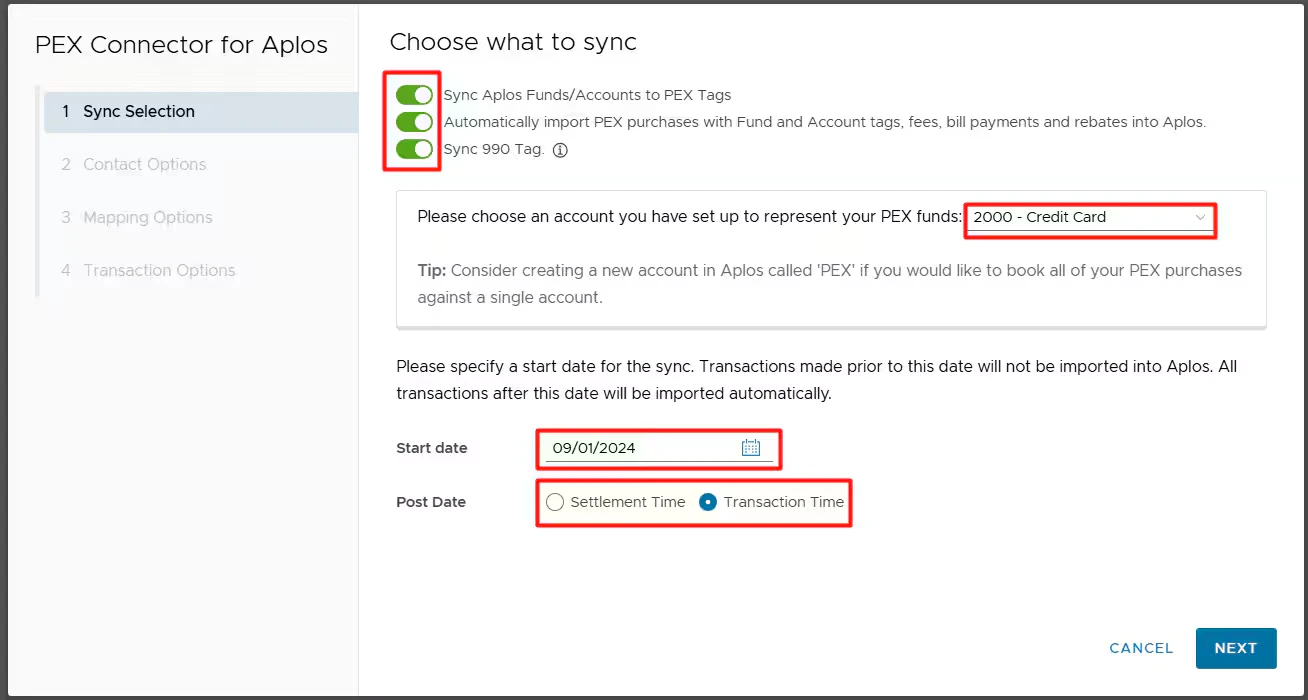
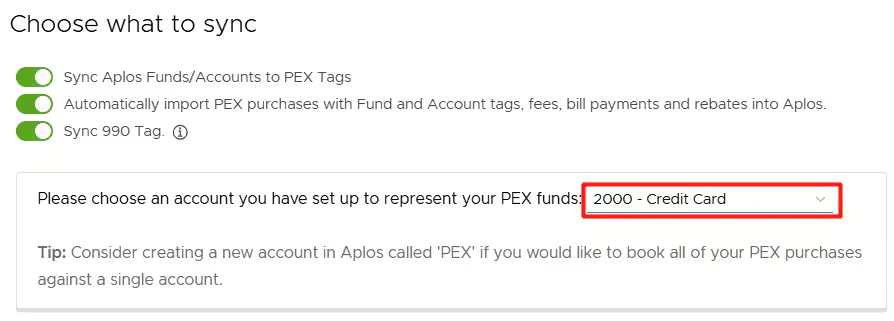
Choose What to Sync
- Sync Aplos Funds/Accounts to PEX Tags.
- Enable this option to successfully retrieve your Fund and Account list from Aplos.
- Automatically import PEX purchases with Fund and Account tags, fees, bill payments and rebates.
- Enable this option to import PEX purchases, fees, bill payments and rebates in Aplos.
- PEX purchases must have the Account and Fund PEX Tags and be approved in order to sync. For details on transaction review, please see our article How to Review Transactions.
- Examples of a PEX Fee include an ISA fee for international use or priority shipping fees.
- An example of a bill payment would be an ACH transfer from your business checking account to your PEX business account.
- If you are funding your PEX account from more than one Operating Account, choose the primary funding account since the Connector only supports one Bank Account.
- Sync 990 Tag.
- You can enable this option to successfully retrieve 990 tags from Aplos.
- If you enable 990 Tag, make sure you have 990 tag enabled in Aplos. Otherwise, your transactions will not sync.

- Select a liability account that represents your PEX balance.
- Purchases will credit this account.
- Bill payments will debit this account.
- Fees in PEX will credit this account.
- Rebates in PEX will debit this account.
Note that the liability account you select should be of the “Register” type in Aplos.
- Select the Start date to begin the sync.
- Transactions after this date will sync to Aplos.
- The start date must be
<1year in the past.
- Select the Post date for syncing transactions to Aplos: either Settlement Time or Transaction Time.
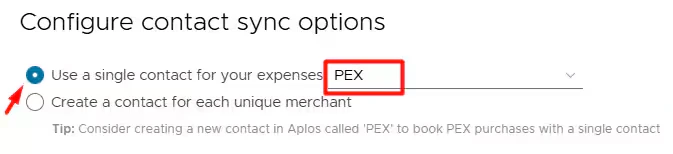
Configure сontact sync options
Select one of the following:-
Choose a contact for your purchases.
- With this option, all PEX purchases will be booked against a single contact selected from the drop down list.
-
Create a contact for each unique merchant.
- With this option, PEX will book purchases against corresponding contacts that already exist in your Aplos account. If there is no corresponding contact then PEX will auto create a new contact in Aplos.
- Note that the connector will not create duplicate contacts, but “Walmart23455”, “Walmart-brooklyn223” are two unique contacts from the connector’s point of view. If you don’t want to have “Walmart23455” and “Walmart-brooklyn223” then read below.
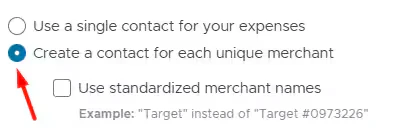
Standardized merchant names
With the “Create a contact for each unique merchant” option, you can also sync your purchases with standardized merchant names if you check “Use standardized merchant names” checkbox.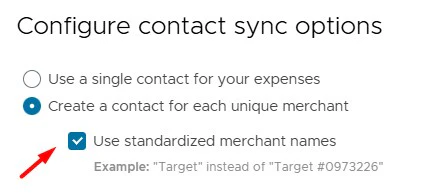
Configure Tag Mapping
Map the Fund, Account fields and Aplos tags. The Fund and Account tags are required to sync purchases to Aplos.Fund (required)
Map the Aplos field “Fund” to the PEX tag called “Fund” that you have previously created following the instructions in the “Setting up Tags in PEX” section.

Account (required)
Map the Aplos field “Account” to the PEX tag called “Account” that you have previously created following the instructions in the “Setting up Tags in PEX” section.


Tags (optional)
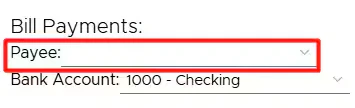
Bill Payments
All purchase transactions must have fund and account tags (approval is optional) for bill payments to sync successfully to Aplos. When you fund a PEX account via either an ACH transfer, the bill payment amount will credit an account (“1000-Checking” in our example below) selected in the dropdown field “Bank Account”. If you are funding your PEX account from more than one Operating Account, choose the primary funding account since the Connector only supports one Bank Account.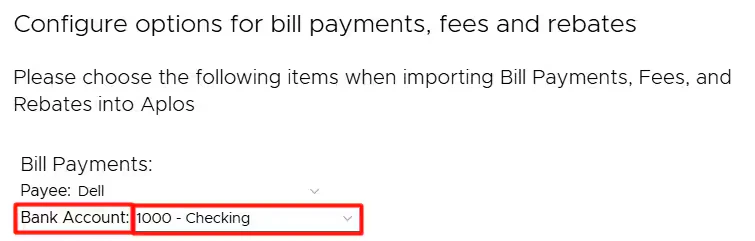

Fees
The fee amount will debit an account (“5100-PEX Fees” in our example below) selected in the dropdown field “Account”.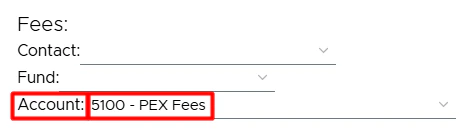

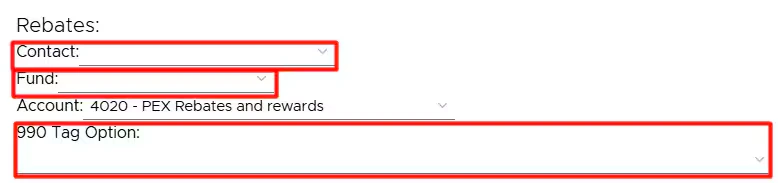
Rebates
The rebate amount will credit an expense or income account (“4020-PEX Rebates and rewards” in our example below) selected in the dropdown field “Account”.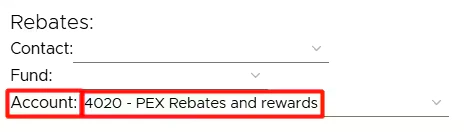

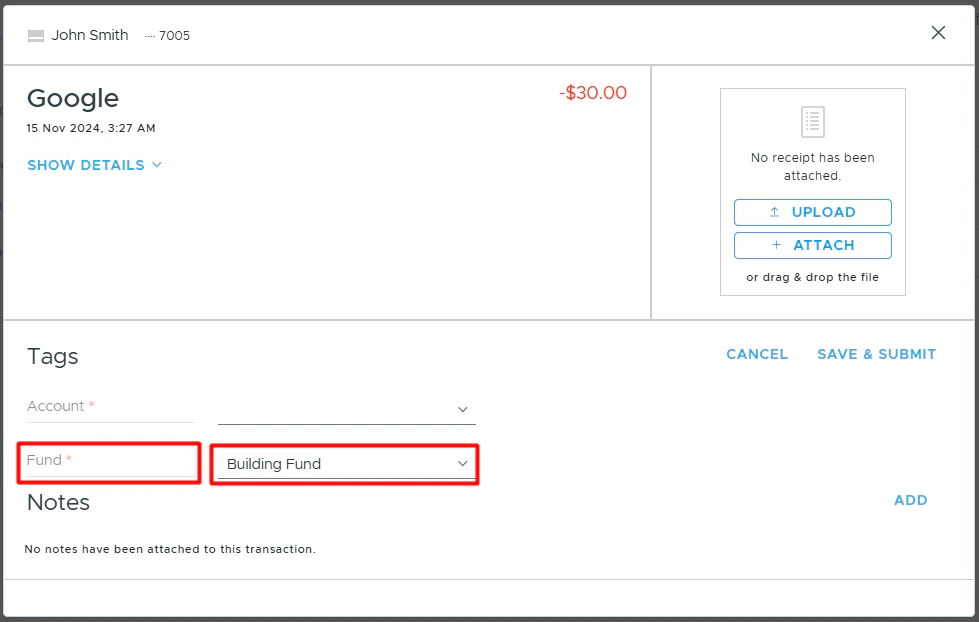
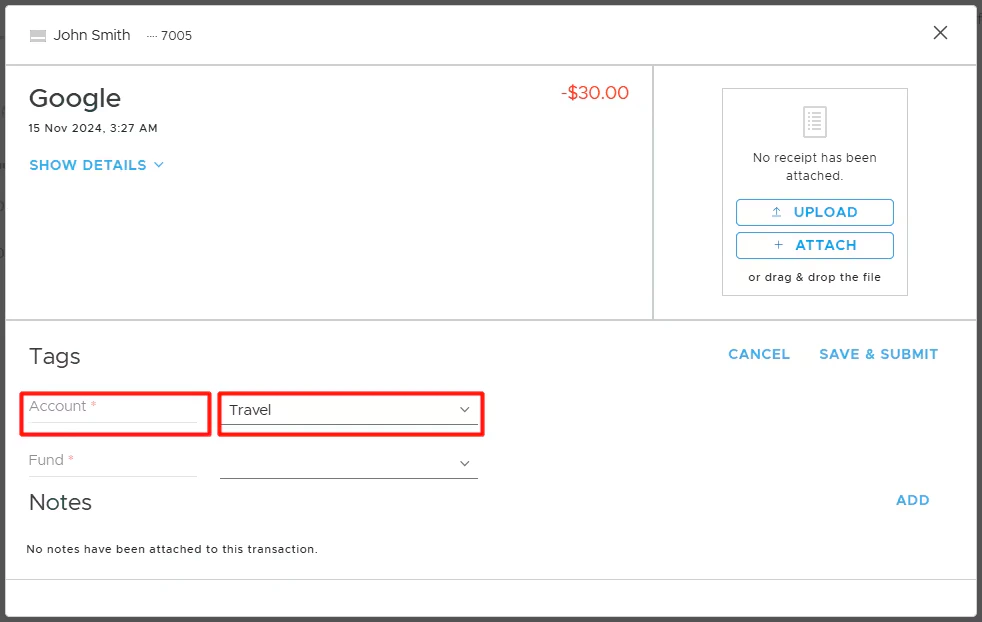
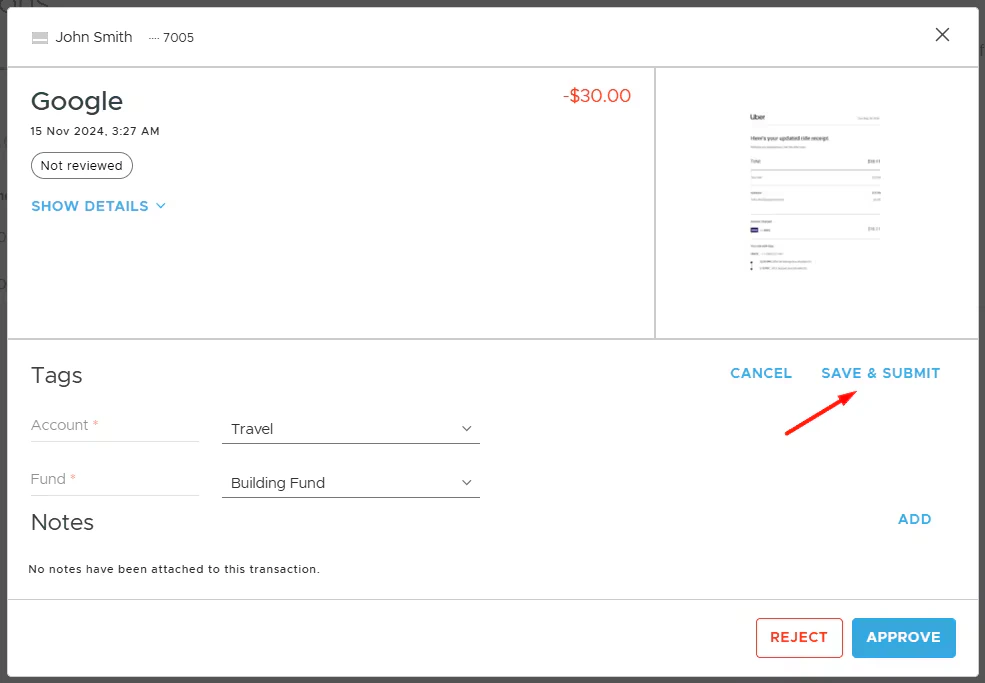
Review Transactions in PEX
To review transactions in PEX:- Navigate to Transactions > Card Transactions
- Click on a transaction row.
- If a receipt is missing, add it by uploading or dragging and dropping.
- Add Fund and Account tags.
- Click Save & Submit.
AUTO TAGGER
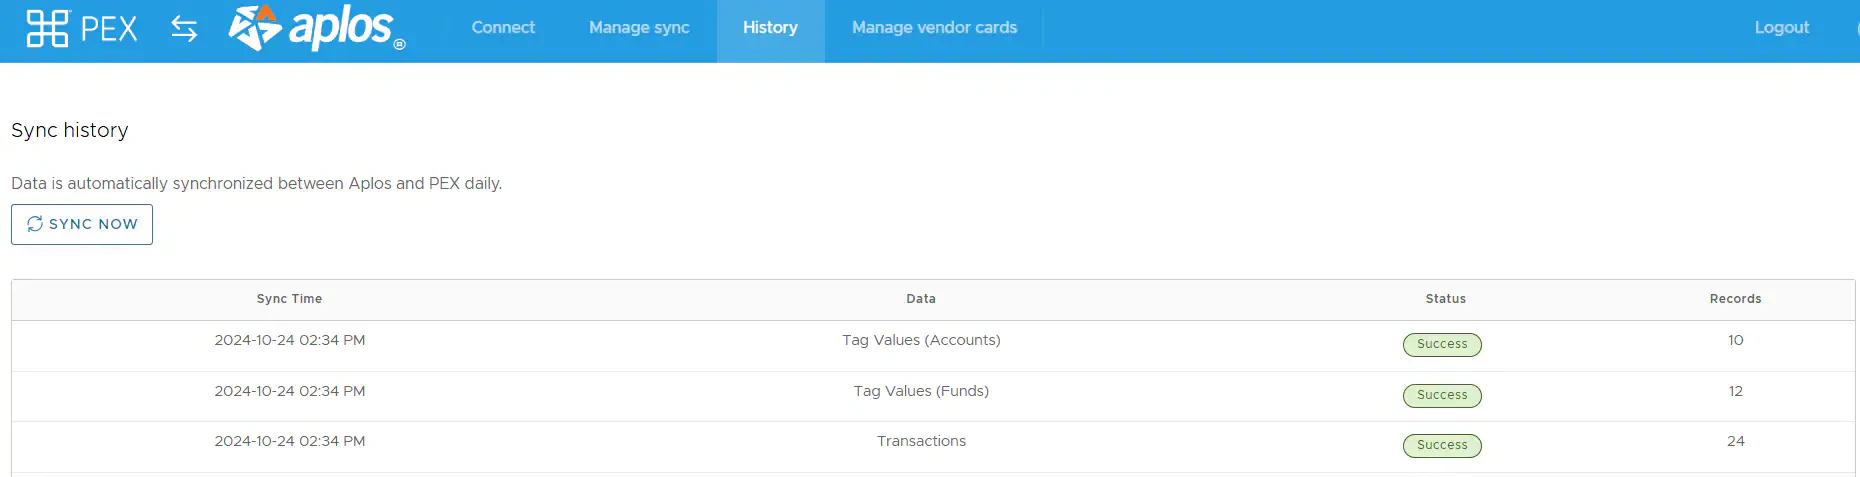
The Auto Tagger app is a great compliment to Aplos. It allows you to create rules that auto-tag purchases. Learn more.Start syncing
Navigate to the History tab and click “Sync Now” to initiate the sync between PEX and Aplos.


View Transactions in Aplos
Log into Aplos account and navigate to Fund Accounting -> Transactions -> Registers -> Select a PEX account (“2000-Credit Card” in the example above) to view synced transactions.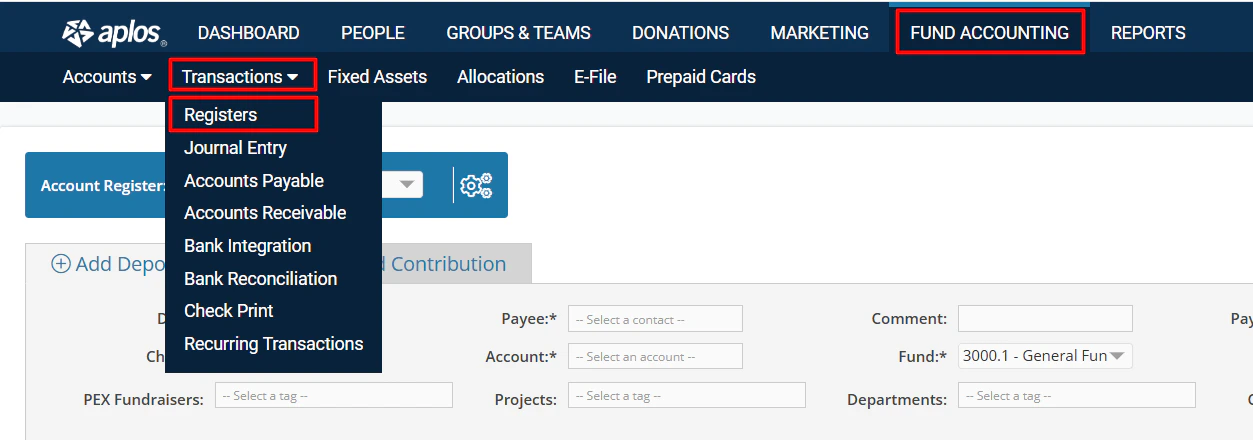
Manage Sync
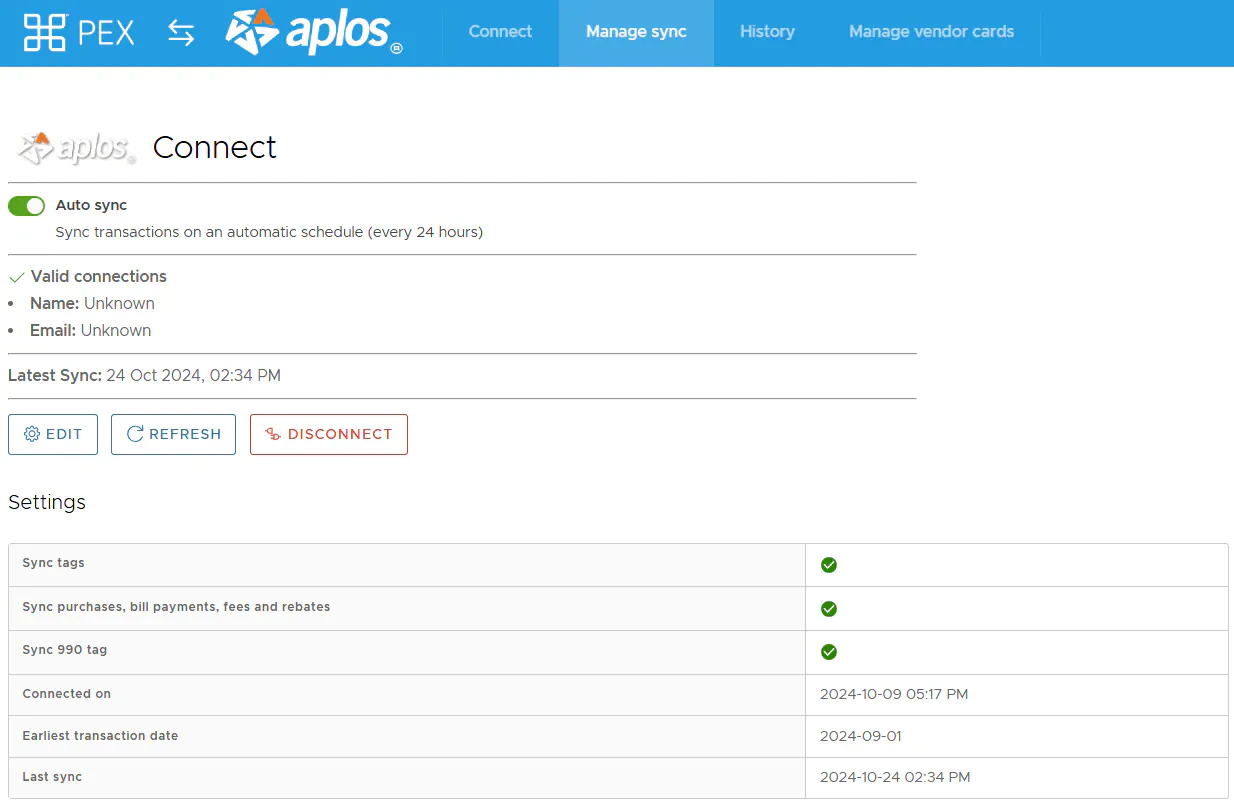
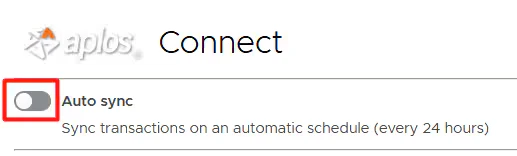
- Enable/disable auto-sync.
- Enabled: Transactions/tag option values sync automatically every 24 hours.
- Disabled: Transactions/tag option values sync will not sync automatically.
- Auto-sync will always process transactions based on the start date specified on the Sync Selection step, with a maximum limit of 2 months back from today. If there is no start date specified on the Sync Selection step then auto-sync will sync transactions up to 2 months back from today.

- View/Edit configuration settings.
- Disconnect from your Aplos account.
FAQ
Why is my purchase not syncing?
Why is my purchase not syncing?
Your purchase might not have synced yet because:
- It is still in a pending status (not settled).
- You have not tagged it with the Account and Fund tags.
- You have not approved the purchase.
Note that the above is applicable only to purchase transactions.
The "Sync now" button does not sync my transactions.
The "Sync now" button does not sync my transactions.
You might have accumulated too many transactions, causing a timeout. To resolve this, set a more recent start date in the “Start date” field, such as one month ago, save the configuration, and click “Sync now”.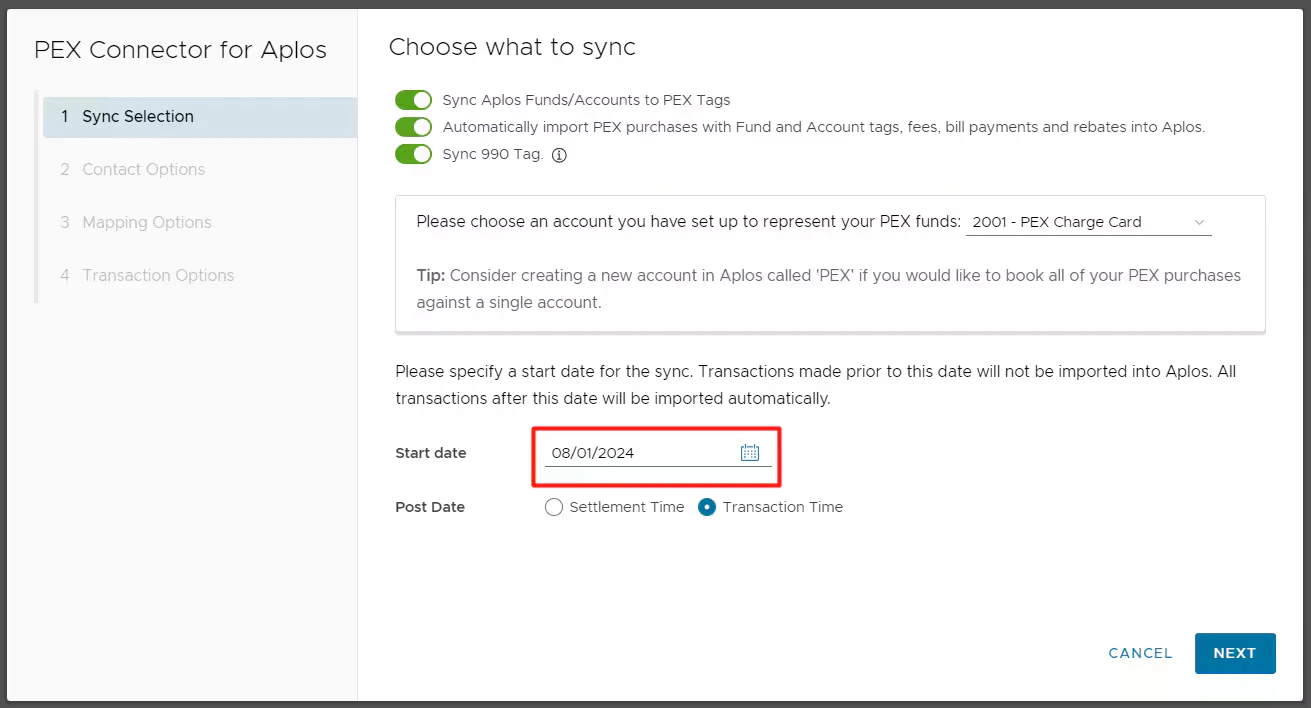
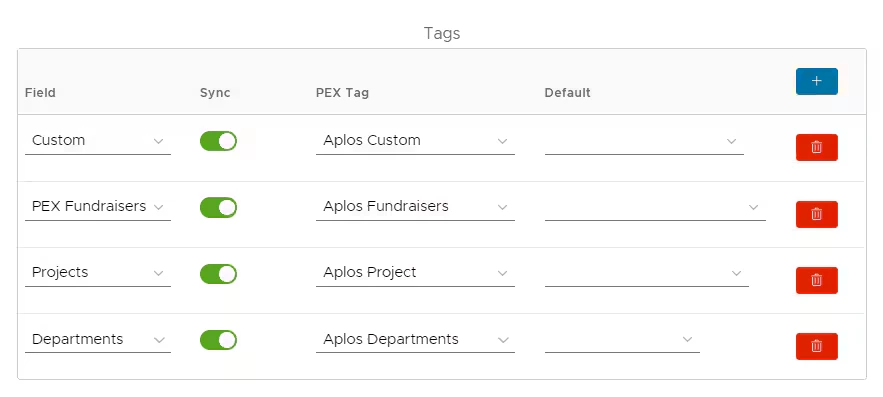
Can I combine manual tag options creation and automatic tag options sync from Aplos to PEX?
Can I combine manual tag options creation and automatic tag options sync from Aplos to PEX?
We strongly recommend using automatic sync of tag options from Aplos to PEX. This will keep your PEX tags and Aplos fields in sync. For more information, check out the “Setting up Tags in PEX” section to add tags and test tag options.Once added, enable the “Sync” toggle for fields on the “Mapping Options” step (as shown in the example below).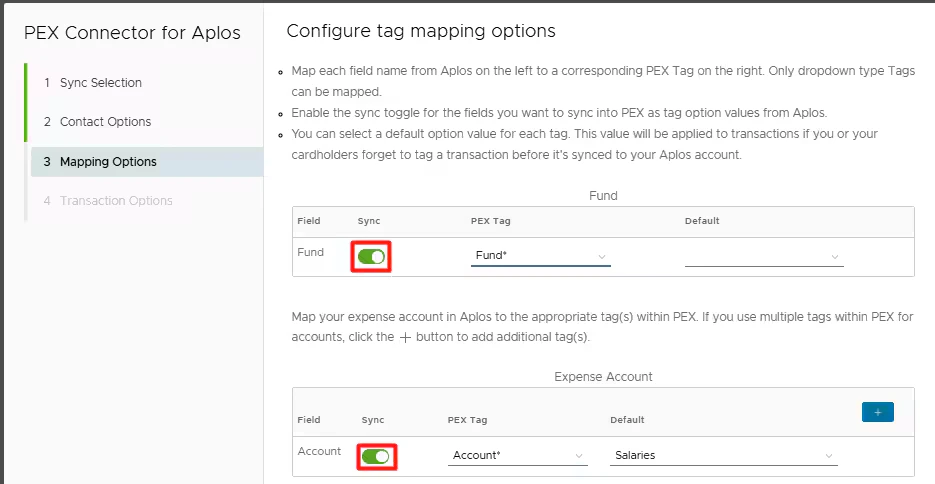
Why have duplicate transactions synced over?
Why have duplicate transactions synced over?
PEX adds a “Synced with Aplos” note to transactions that have already synced over to Aplos. Deleting this note will trigger a re-sync of the transaction. To add additional details, you can create a separate note. If you need to modify the “Synced with Aplos” note without triggering a duplicate sync, simply add your content before or after the existing text “Synced with Aplos”.
Will a previously synced transaction re-sync to my Aplos account if I change its status (Rejected -> Approved), re-tag or add another receipt?
Will a previously synced transaction re-sync to my Aplos account if I change its status (Rejected -> Approved), re-tag or add another receipt?
Every synced transaction has a “Synced with Aplos” note. As long as you don’t remove the “Synced with Aplos” note on a transaction, it will not re-sync to your Aplos account.
Will credits/refunds sync over to Aplos?
Will credits/refunds sync over to Aplos?
Credits/refunds will also sync over as a separate line item if appropriately tagged.
Why do synced transactions show the wrong standardized contact name in Aplos?
Why do synced transactions show the wrong standardized contact name in Aplos?
We’ve reached out to the Aplos team and are waiting on a fix. In the meantime, you can manually create a contact in Aplos using the correct standardized name (like “Amazon” or “Apple”). This ensures future purchases sync with the correct contact name.
Can transactions be automatically tagged?
Can transactions be automatically tagged?
Yes. PEX Auto Tagger offers a solution. It allows you to create rules that auto-tag purchases. Learn more.
Do pending transactions get synced?
Do pending transactions get synced?
No. Only transactions in settled status get synced to your account. If you see a “Pending” label next to the merchant name as shown on the screen below, then the transaction is still in the pending status.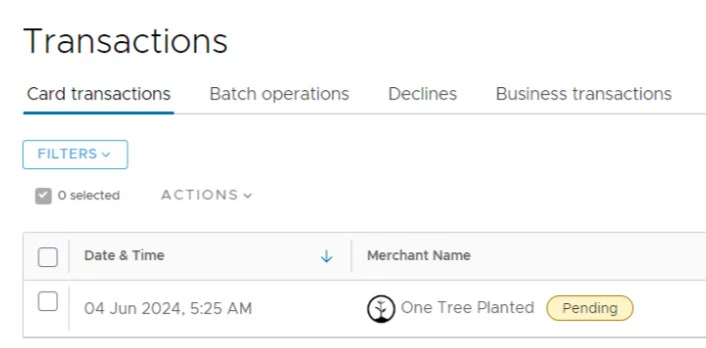
How to identify which purchase transactions have synced?
How to identify which purchase transactions have synced?
There are two ways to identify which purchase transactions have synced to Aplos: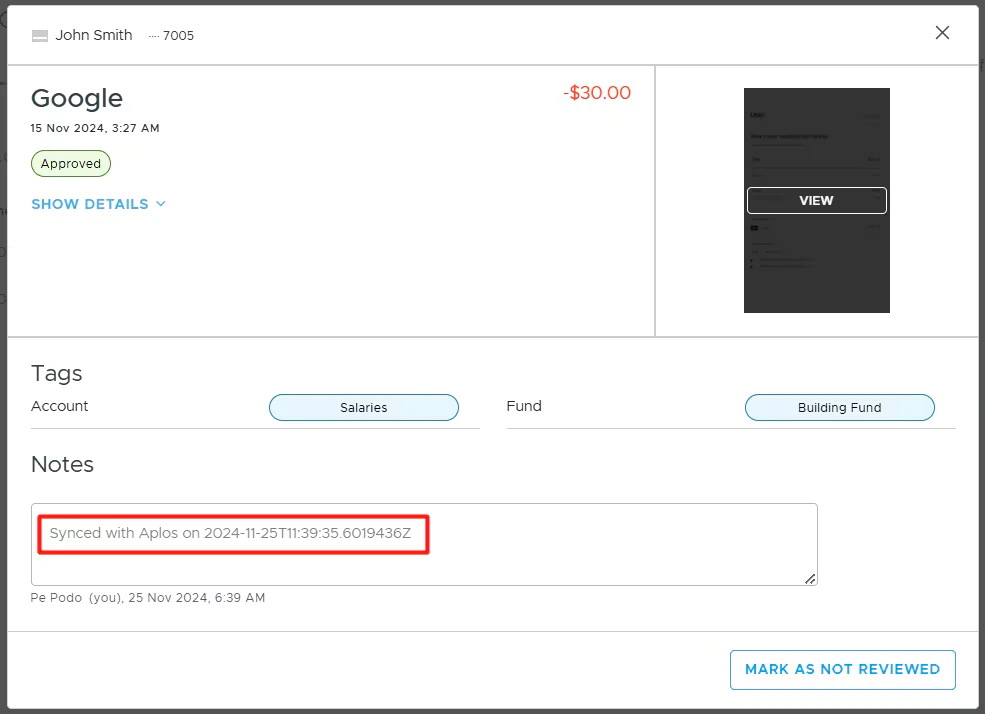
- Every synced purchase has a “Synced with Aplos” note.
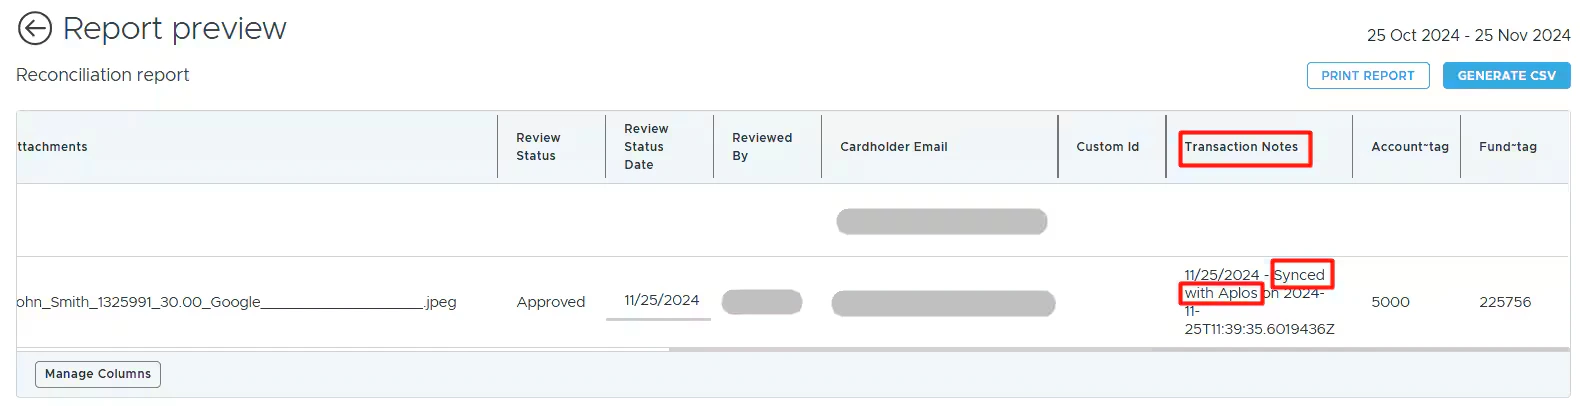
- Navigate to Reports -> select the Generate tab -> select the Reconciliation report -> click “Preview” -> see the Transaction Notes column. Every cell with a “Synced with Aplos” note marks a purchase that has synced to Aplos.
How to identify which purchase transactions have not synced?
How to identify which purchase transactions have not synced?
Navigate to Reports -> select the Generate tab -> select the Reconciliation report -> click “Preview” -> see the Transaction Notes column. Any cell without a “Synced with Aplos” note marks a purchase that likely hasn’t synced to Aplos. This is usually because the Aplos Fund tag and/or the Aplos Account tag columns are also empty.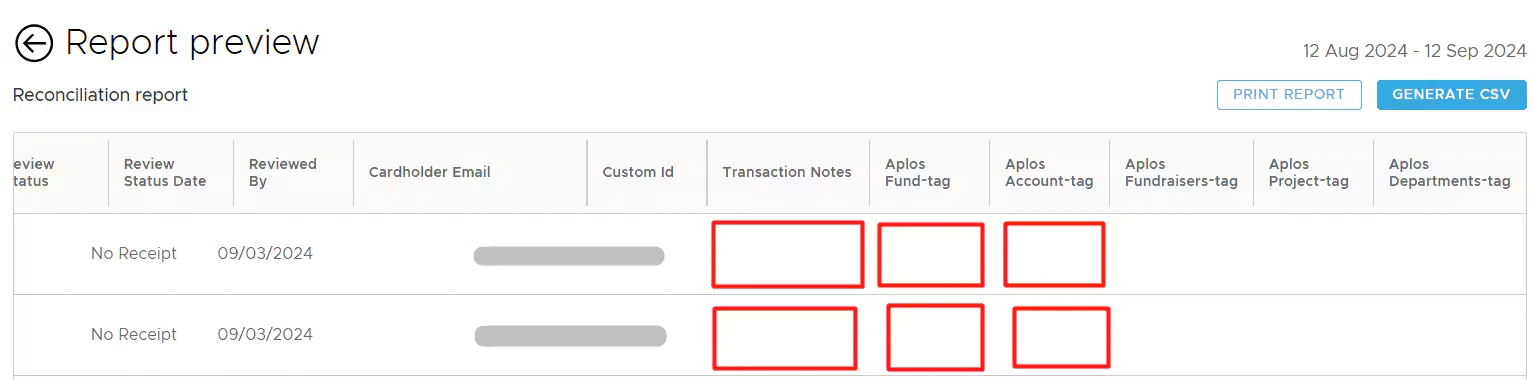
Didn’t find the answer you were looking for?
Didn’t find the answer you were looking for?
Check out our Accounting Software Connector Troubleshooting article.