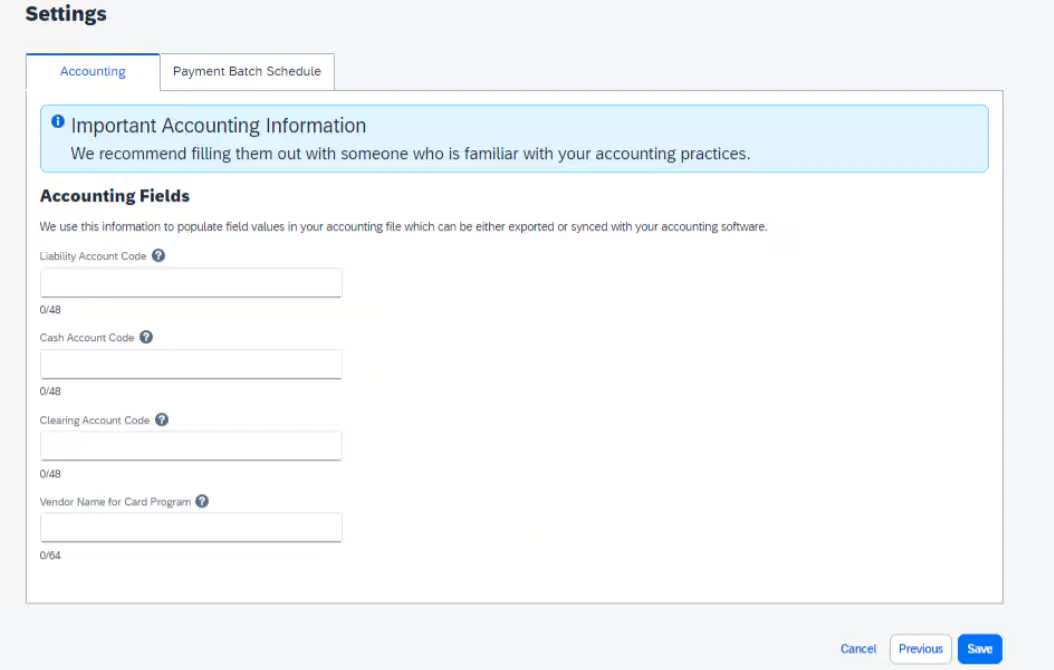
Set up in SAP Concur
Complete program details with the following information: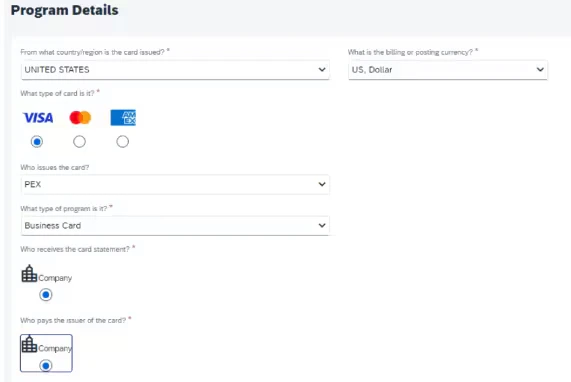
- Country/region: United States
- Billing/posting currency: US, Dollar
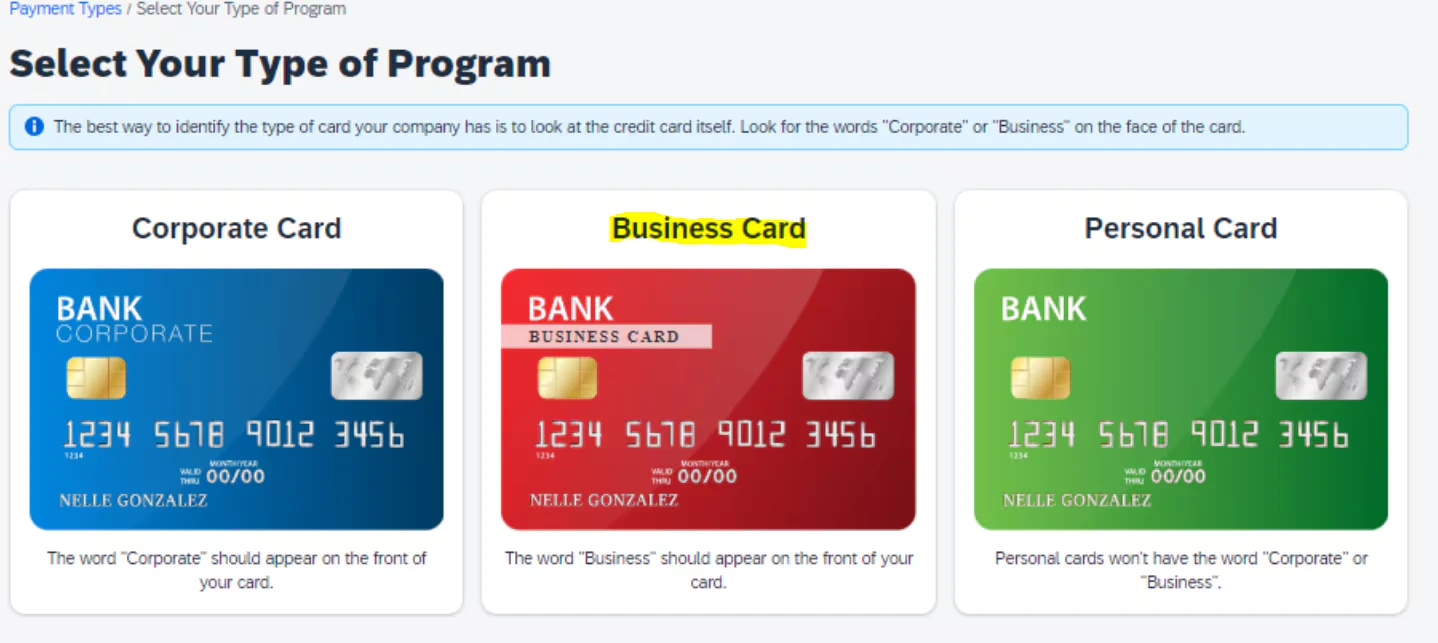
- Type of card: VISA
- Who issues card: PEX
- Who receives card: Company
- Who pays the issuer: Company
- What do you want to name the card program: [Enter Name]
- Note: A default name is provided, but you can enter a new name.
- How do you want to pay: [Select account details]
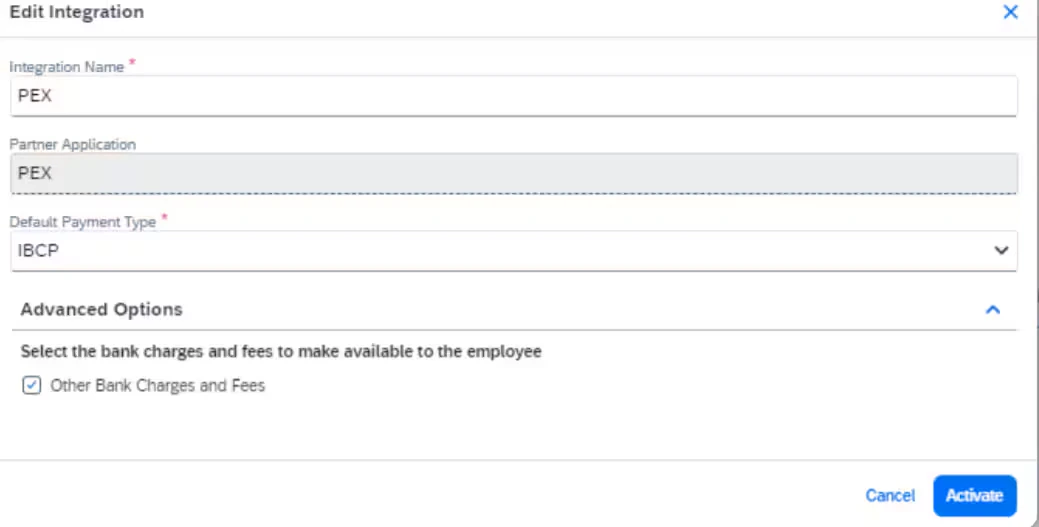
Card Integration Admin set up
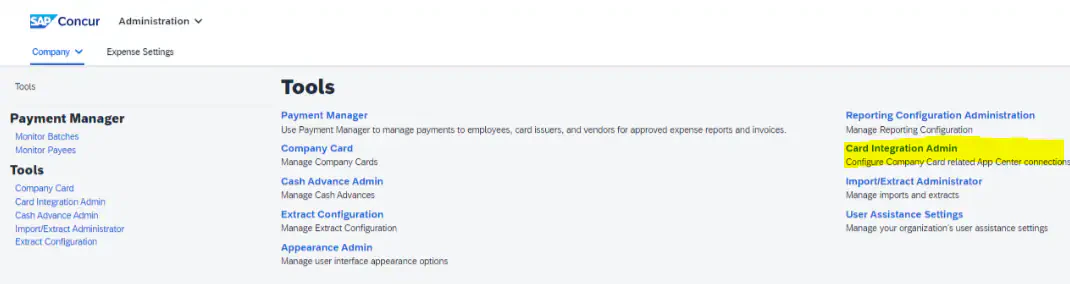

Enter the integration details: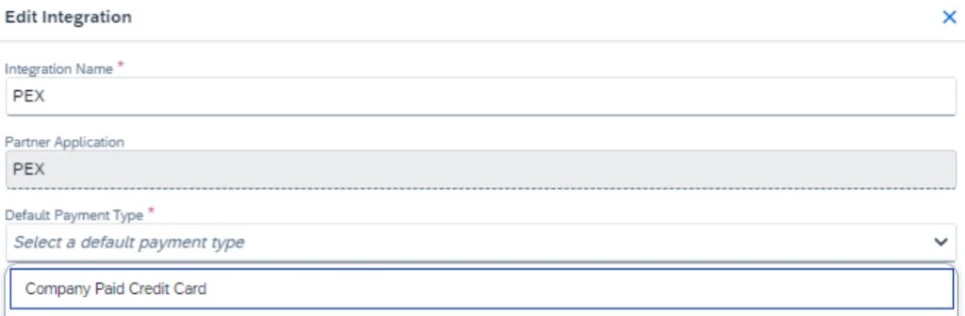
- Integration Name: PEX
- Partner Application: PEX
- Default Payment Type: Company Paid Credit Card
Connect PEX and SAP
There are two ways to connect your PEX and your SAP Concur accounts:Connect from the PEX Marketplace
To connect from the PEX Marketplace, follow these steps:Log in to http://dashboard.pexcard.com/
Navigate to Apps > Available
Click More info > Install > Launch.PEX will redirect you to a Manage page.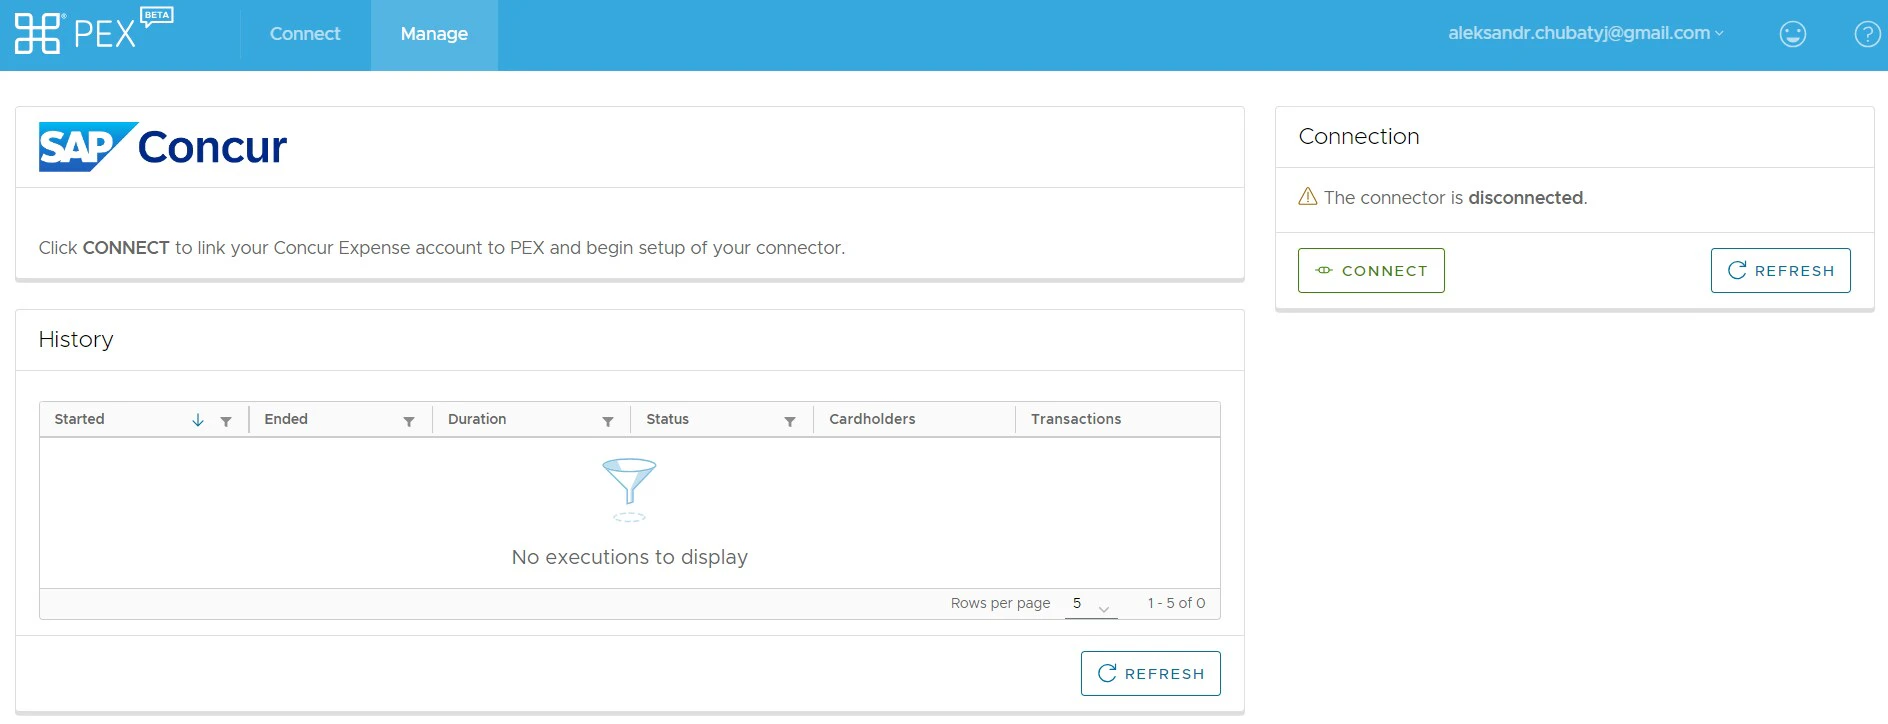
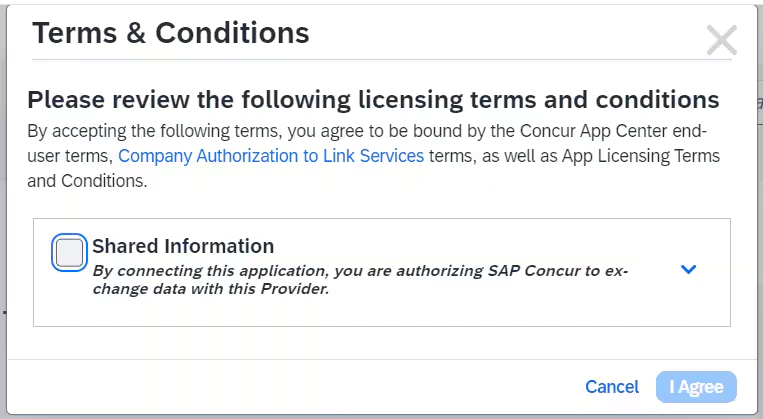
Note:To install the connector, you need to enable the following permissions: Edit business settings & apps, Manage cardholder, View card transactions. You can enable them in My Profile → Permissions.
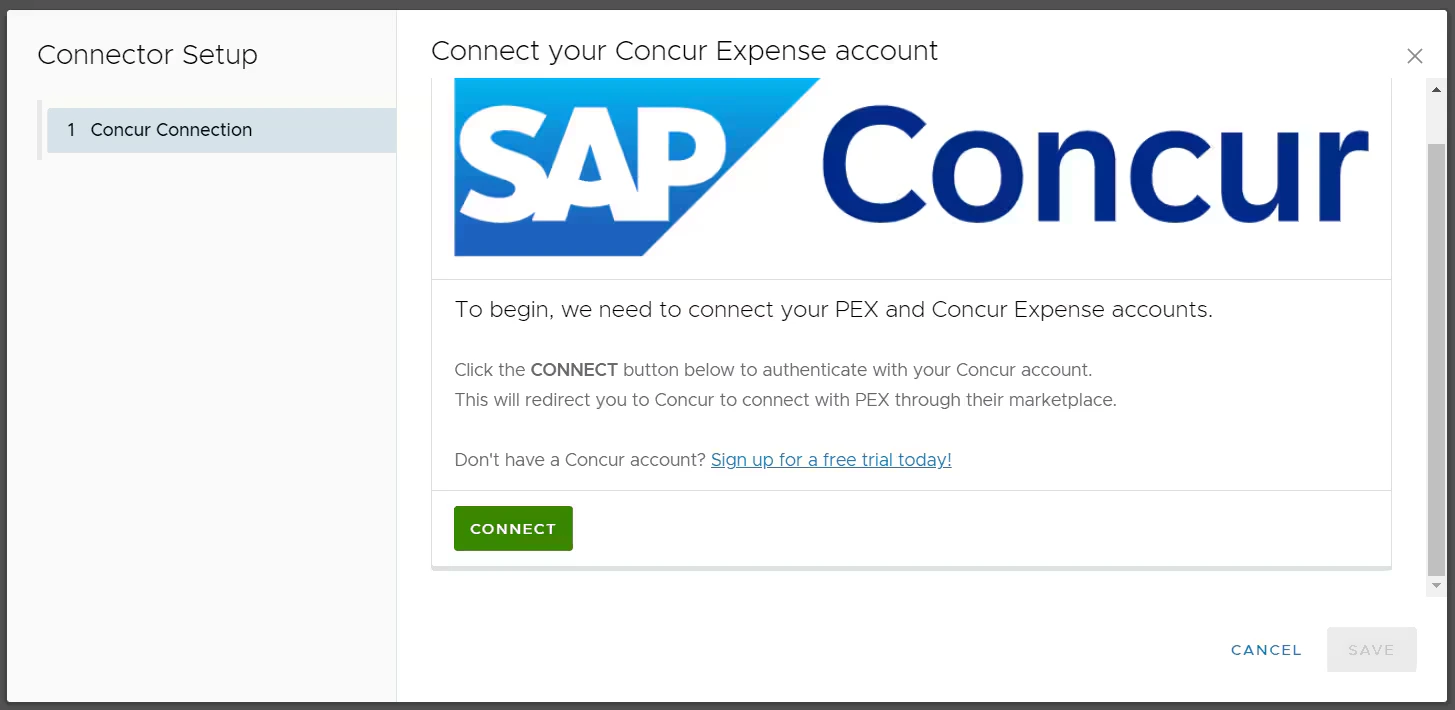
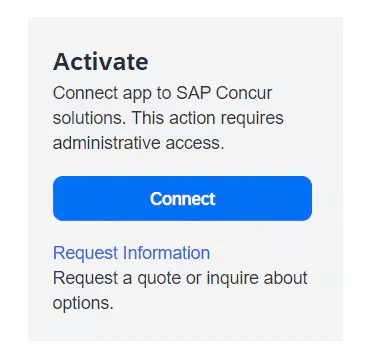

Connect from SAP Concur App Center
To connect from the SAP Concur App Center, follow these steps: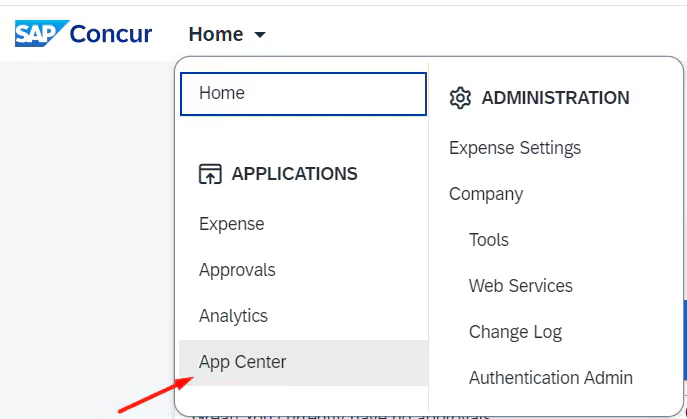


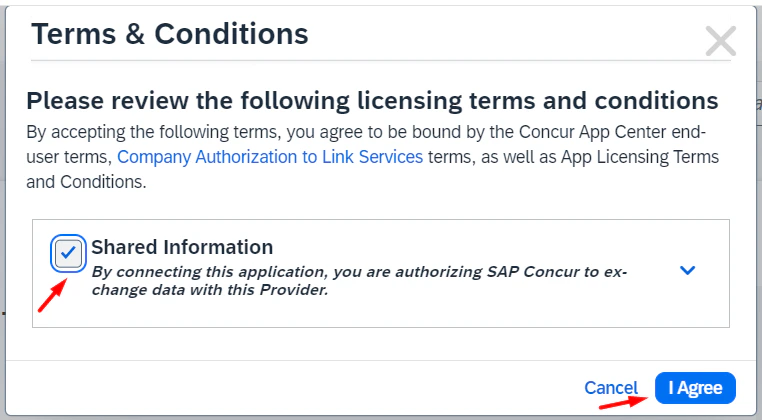
If you don’t have a PEX account yet, click Sign up with PEX.This redirects you to https://start.pexcard.com/get-started so you can create a PEX account first.
If you already have a PEX account, click Connect your PEX account. This redirects you to your PEX account.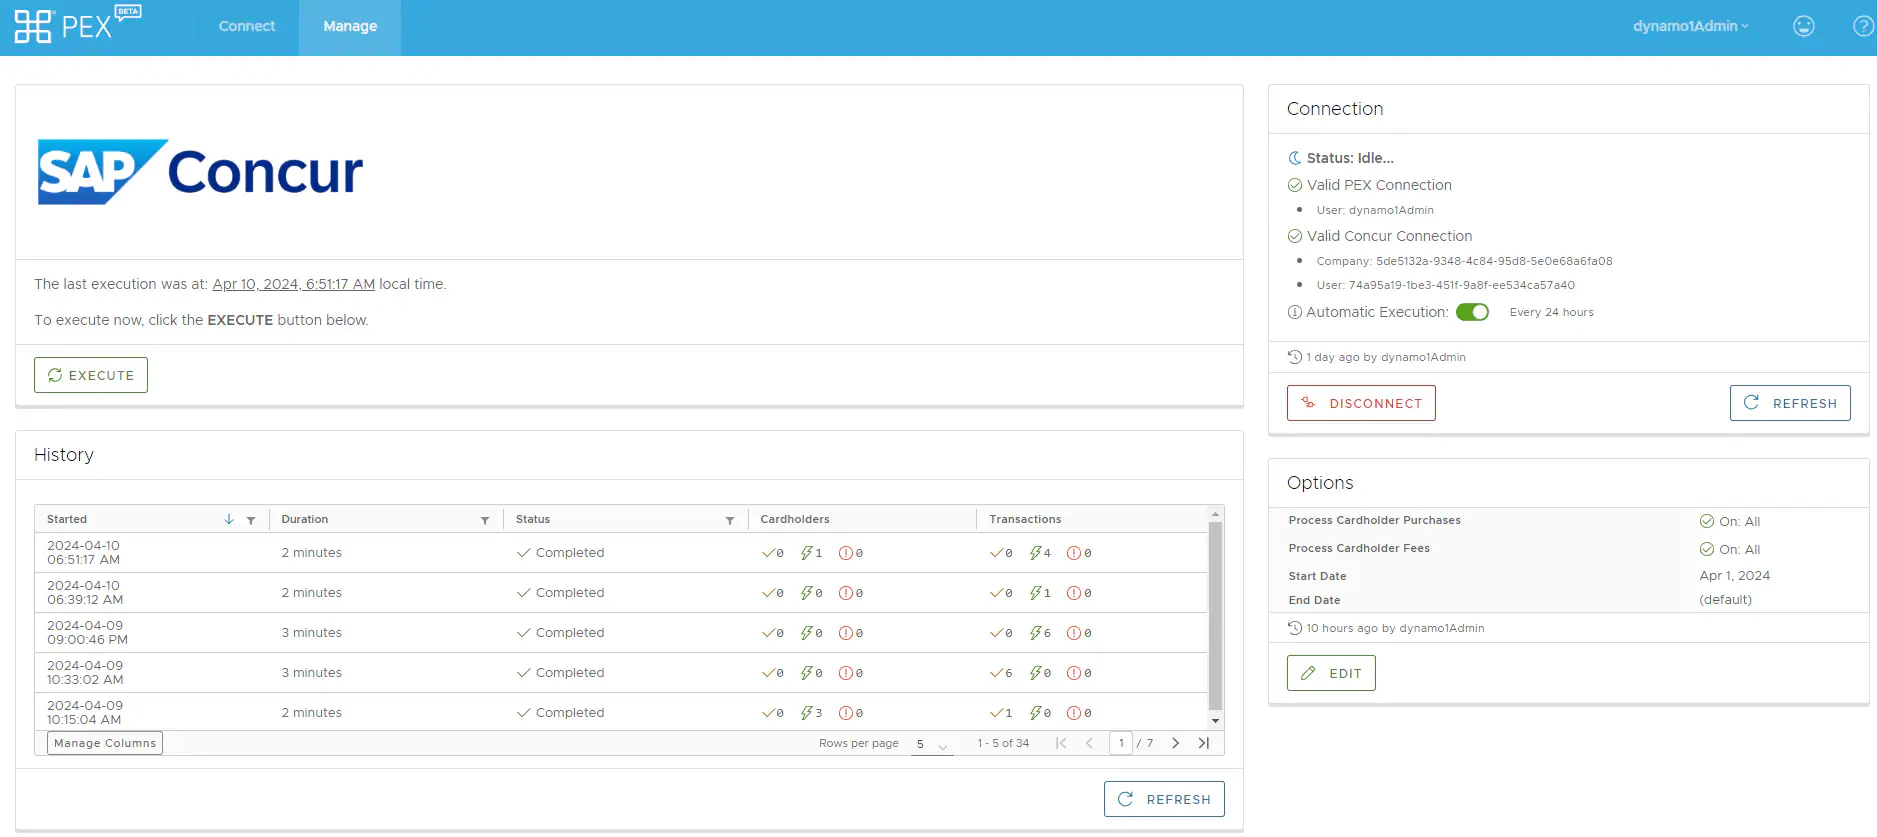
- Log in to http://dashboard.pexcard.com/
- Navigate to Apps > Available
- Scroll to locate PEX Connector for SAP Concur.
- Click More info > Install > Launch.
- PEX will redirect you to a Manage page.
- Click Connect.
- PEX will redirect you to the Connector wizard.
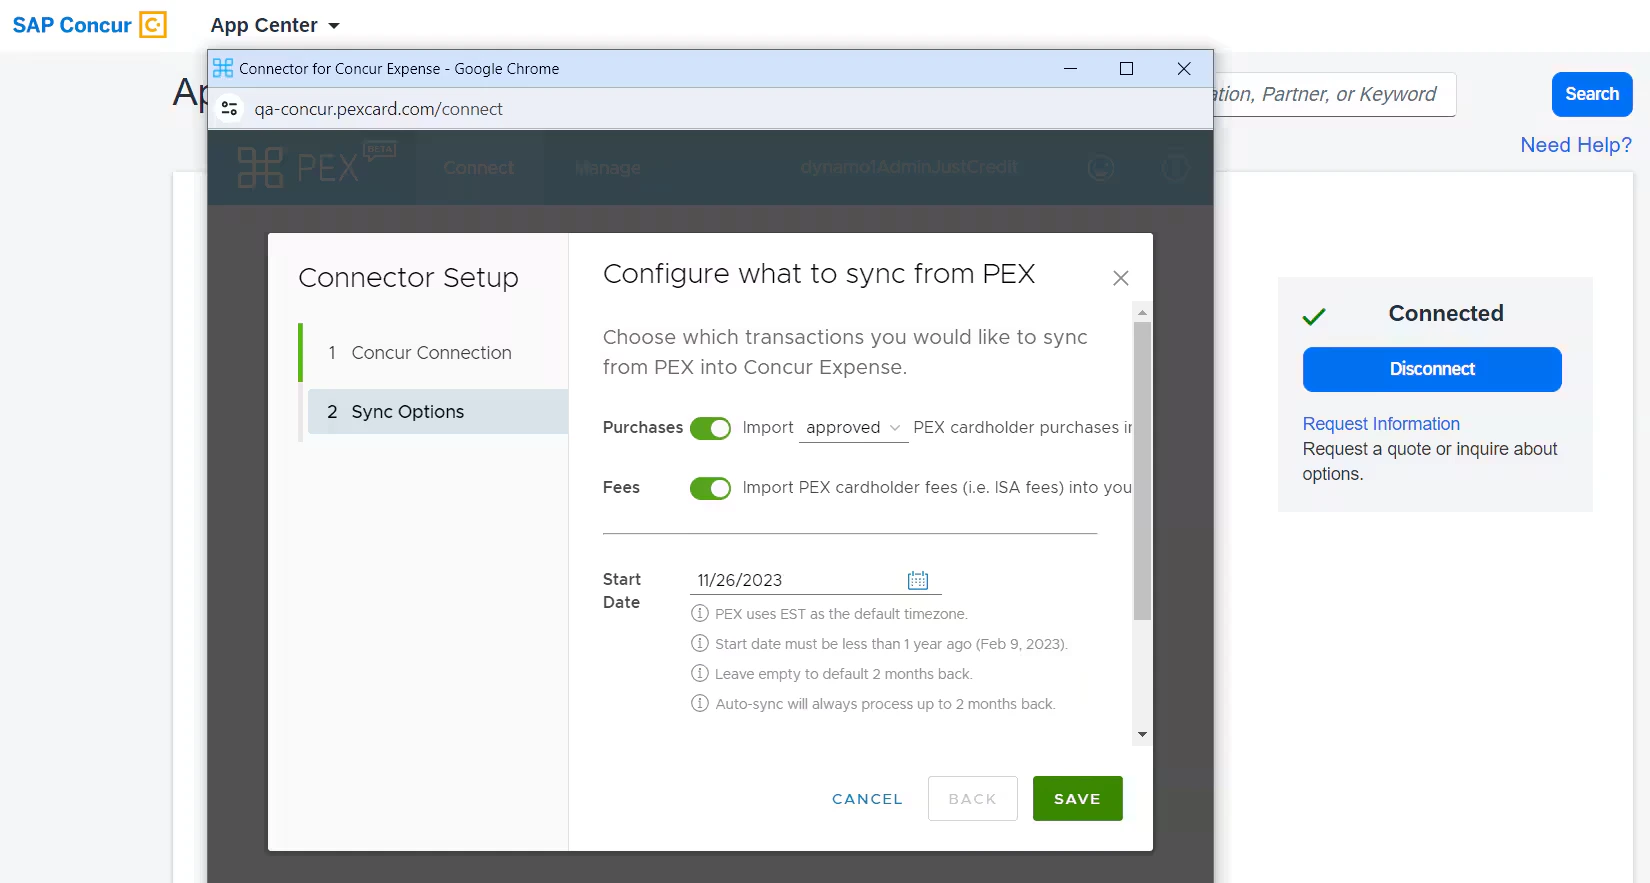
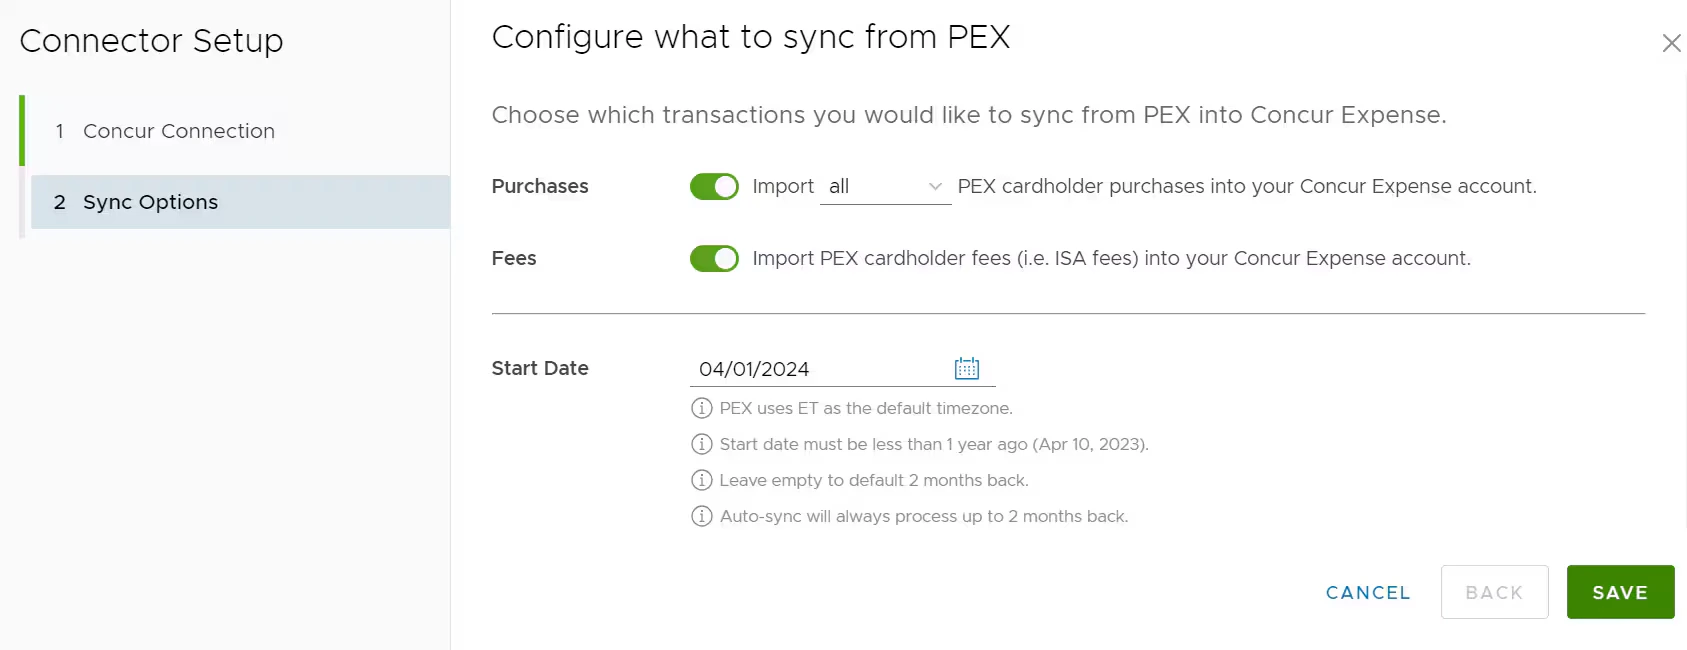
Configure your Connector
Choose which items you would like to sync to your SAP Concur account.- Import PEX cardholder purchases into your Concur Expense account. Enable this to successfully retrieve your PEX purchases. You can choose to sync all PEX cardholder purchases (regardless of approval status) or just approved ones. We recommend choosing All if you approve your transactions within SAP Concur and Approved if you approve transactions within PEX. For details on transaction review, see How to Review Transactions.
- Import PEX cardholder fees (for example, ISA fees) into your Concur Expense account. Enable this option to successfully retrieve your PEX cardholder fees.
-
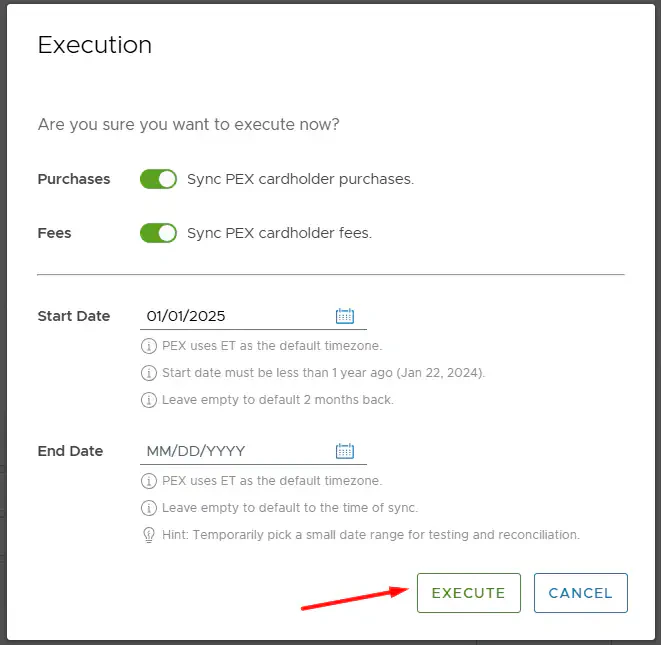
Specify a start date for the sync. Transactions after this date will be synced.
- PEX uses ET as the default timezone.
- Start date must be less than 1 year ago.
- Leave empty to default 2 months back.
- Auto-sync will always process up to 2 months back.
-
Specify an end date for the sync.
- PEX uses ET as the default timezone.
- Leave empty to default to time of sync.
- Hint: Temporarily pick a small date range for testing and reconciliation.
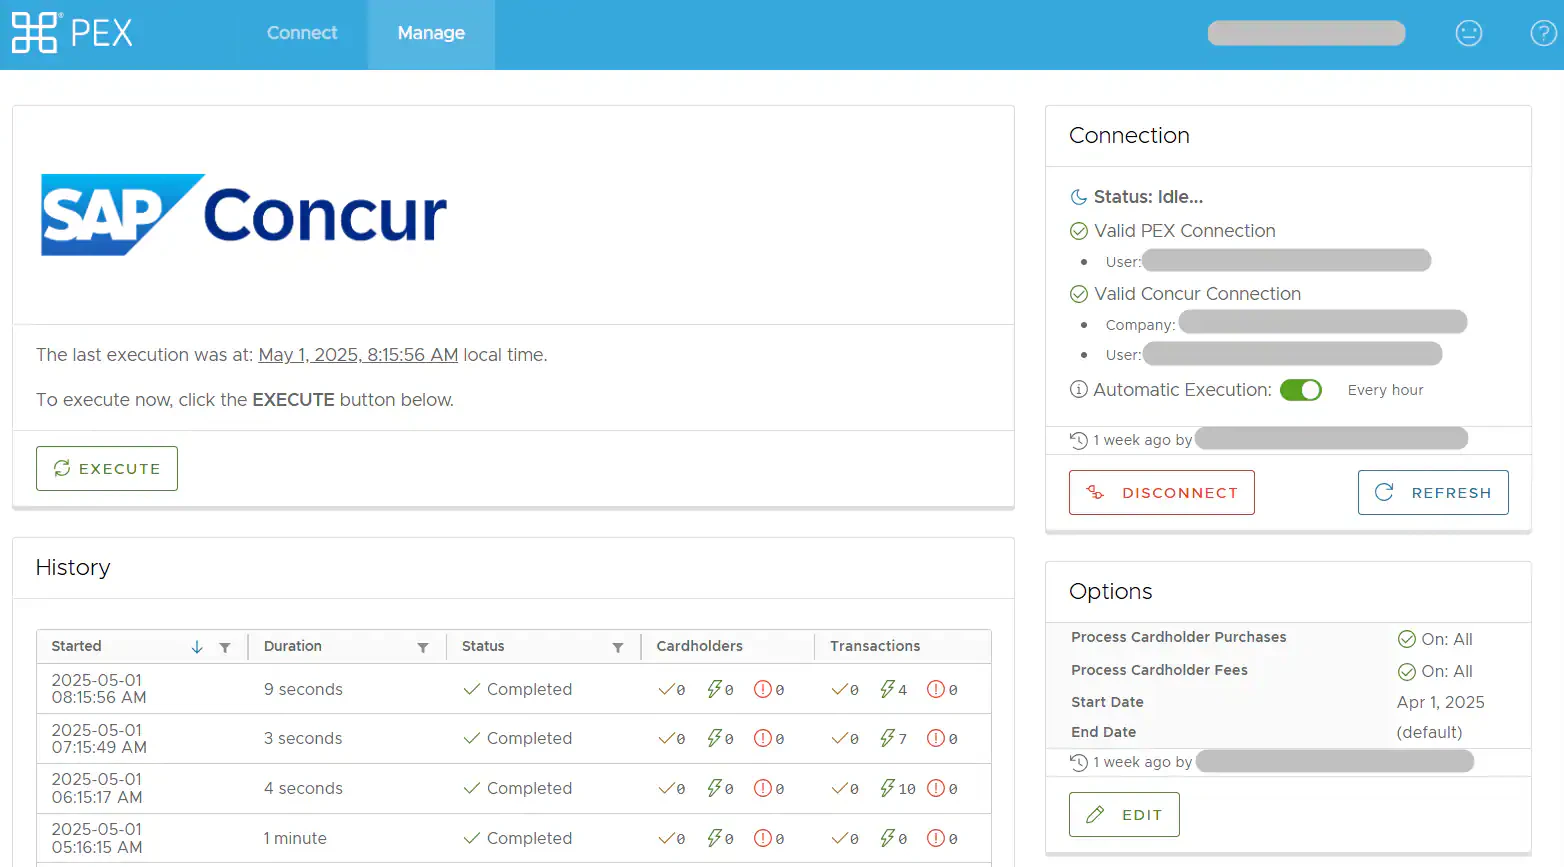
Manage sync
On the Manage tab you can:-
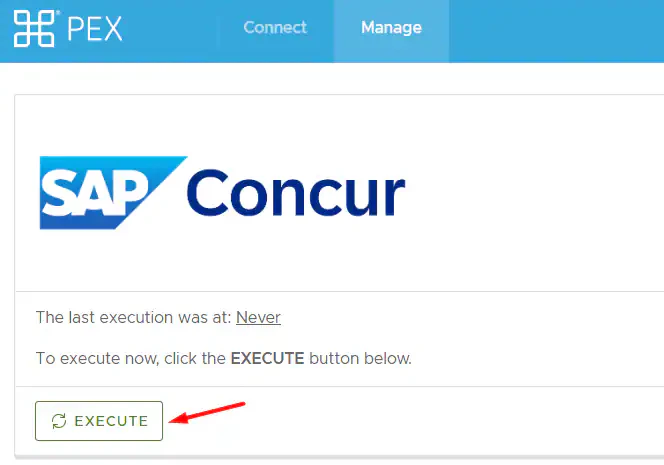
Manually sync transactions by clicking Execute.
- View Sync history.
- Refresh Sync history.
- View the connection status.
- Auto-sync runs every hour.
- Disconnect from your SAP Concur account.
- Refresh connection status.
- View or edit configuration options.
Note:Transactions are synced automatically every hour.
Auto-sync
Auto-sync will always process transactions based on the start date specified on the Sync Options step, with a maximum limit of 2 months back from today. If there is no start date specified on the Sync Options step, auto-sync will process transactions up to 2 months back from today.Manual sync
If you trigger manual sync, the system will process transactions based on the start date specified on the Sync Options step, with a maximum limit of 1 year back. You cannot set the start date older than 1 year back. If there is no start date specified on the Sync Options step, manual sync will process transactions only up to 2 months back from today.Assign individual PEX cards to Concur accounts
Follow the steps in the SAP Concur support article to sync fee and purchase transactions to individual Concur accounts. Make sure the cardholder’s email address matches exactly in both PEX and SAP Concur; otherwise, transactions may not sync properly.View transactions in Concur
Log into Concur and go to Available Expenses. From there, the employee can code and upload receipts and create an expense report for approval.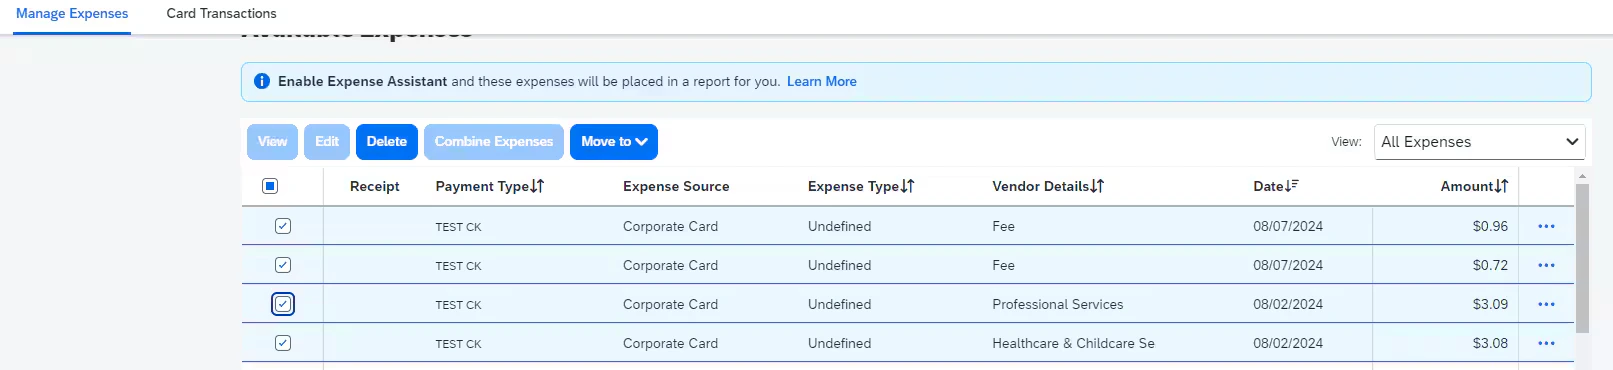
FAQ
Can I enable auto-sync?
Can I enable auto-sync?
Yes, the Connector will automatically sync transactions every hour.
What transactions are synced?
What transactions are synced?
Purchases in a settled status and cardholder fees (for example, ISA fees). Closed cards are not synced by default but can be requested if needed (see email below).
I can't find synced transactions.
I can't find synced transactions.
Most likely, individual PEX cards haven’t been assigned to Concur accounts. Follow the instructions above to complete this. In the meantime, you can view unassigned transactions under Administration View → Company Card Tool → Manage Transactions.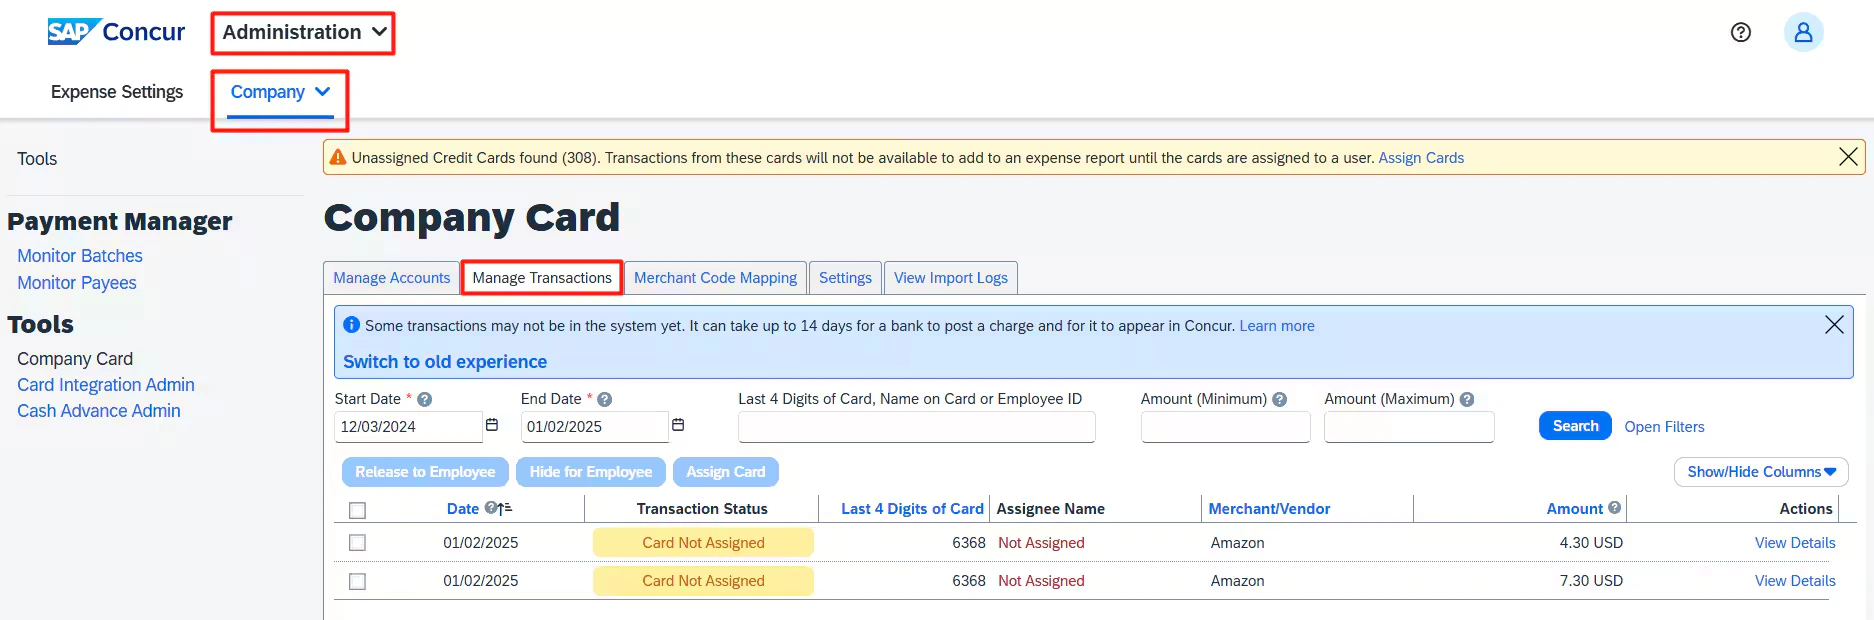
Does the connector sync purchase refunds and vendor credits to SAP Concur?
Does the connector sync purchase refunds and vendor credits to SAP Concur?
Yes.
What data points does PEX sync to Concur?
What data points does PEX sync to Concur?
PEX syncs the following data points to Concur: Type, First Name, Last Name, Time, Description, and Amount. For example:
How does this information show up in Concur?
How does this information show up in Concur?
The transactions populate for each PEX cardholder or employee based on email address. The emails used in PEX and Concur must match.
How do employees see their PEX transactions in Concur?
How do employees see their PEX transactions in Concur?
Log into Concur and go to Available Expenses. From there, the employee can code and upload receipts and create an expense report for approval.
Will new PEX cards automatically sync into Concur?
Will new PEX cards automatically sync into Concur?
If auto sync is turned on, all new cards will automatically show up in SAP Concur. This includes card renewals and replacements for lost, stolen, damaged, or compromised cards.
Does PEX provide multi-entity support with Concur Expense?
Does PEX provide multi-entity support with Concur Expense?
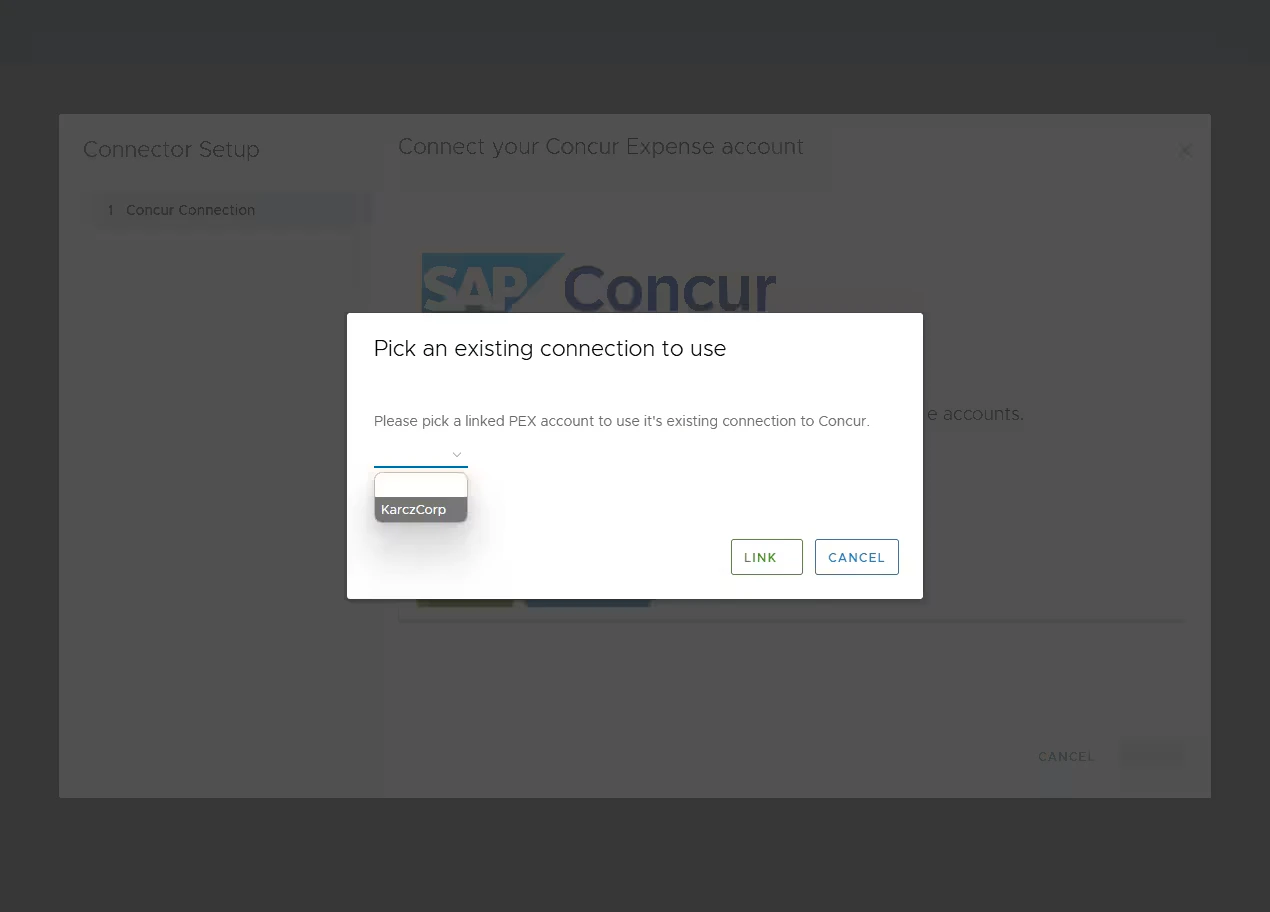
Yes. If you have multiple PEX accounts and use Concur Expense, you can sync multiple PEX accounts into one Concur account. Whether your business has multiple franchises, locations, or departments, your PEX data can flow into your Concur Expense account. If you manually disconnect any of your PEX accounts linked to a single Concur account, all other connected accounts will also be disconnected from that Concur account.
How do I configure multiple PEX accounts with one Concur account?
How do I configure multiple PEX accounts with one Concur account?
To configure multiple PEX accounts with a single Concur account, you must use the Link Business feature in the Concur connector. One PEX account should be connected first, and the others will share its connection. The link feature becomes available when the logged-in admin has linked business accounts set up and opens the connector under the linked (admin) account.Click Use existing.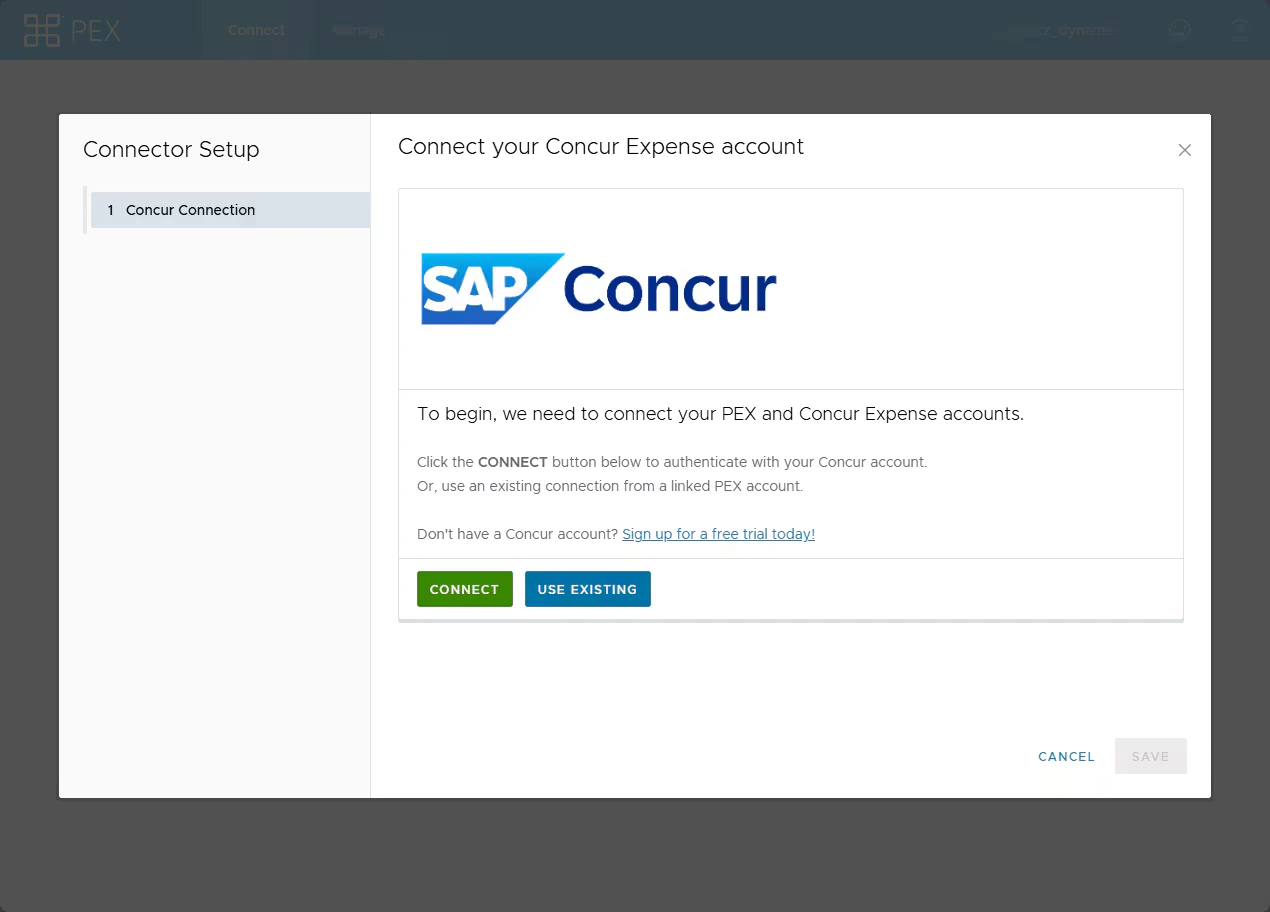
Will future transactions sync into Concur under the new user's feed when a vendor card is reassigned from one user to another?
Will future transactions sync into Concur under the new user's feed when a vendor card is reassigned from one user to another?
The transactions will continue to sync to the same card or account in Concur.