Once they’re in PEX, you can easily code/tag transactions before they sync to GreenSlate. They will then sync to GreenSlate with the correct project, account, episode, location, etc.
3
Click Add Tag.
4
Select Dropdown as the type.
5
Enter a name: Account.
6
Optionally, add a description like “GreenSlate Account”.
7
Check Enabled to make this tag visible on transactions.
8
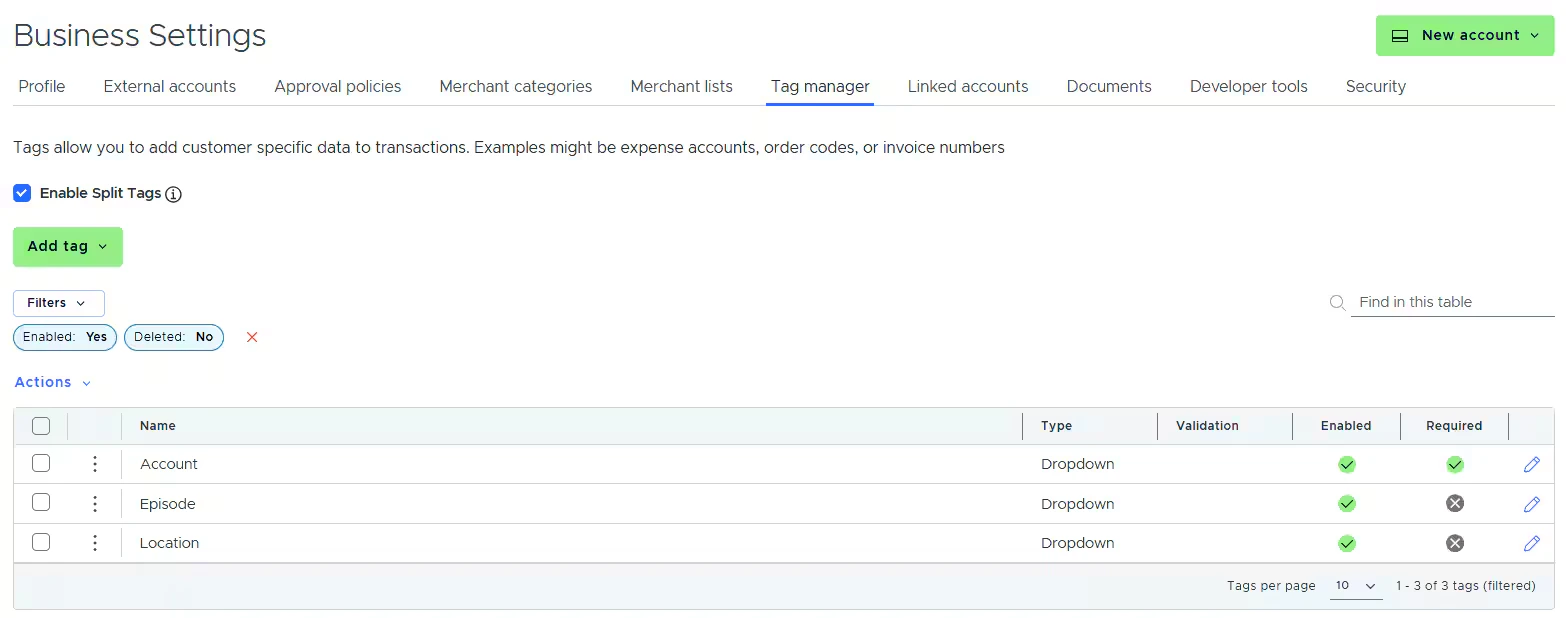
Choose whether or not this tag is required.
  • If the “Required” checkbox is checked, cardholders must tag a transaction with it.
9
Click Save tag to finish.
  • The new tag will appear on the Tag Manager page.
10
Create one tag for each GreenSlate field mapped to a PEX tag (like Episode, Location, etc.) following the same steps above.
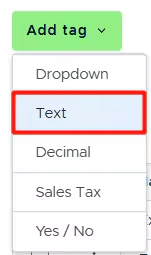
Note:If you want to map the Description field to a tag, you must create a Text tag type.
11
You will have PEX tags appear in Tag Manager.
Once the tags are set up, you will also see them:
  • In the dropdown lists of the Mappings table so you can do the mapping.
  • On the PEX transaction details screen, so you and your Cardholders can tag transactions.
Last modified on April 22, 2026