Note:On April 30, 2026 we will be deprecating the Legacy connector for GreenSlate.
Ways to sync transactions
You can automatically sync transactions using either the legacy app or the new app. If you use the legacy app, you don’t need to configure any settings—purchases will sync to GreenSlate automatically. However, receipts and fees will not sync to GreenSlate. To connect to the legacy app:Log in to http://dashboard.pexcard.com/
Navigate to Apps > Available
Click More info > Install > Launch.
Note:To install the connector, you need to enable the following permissions: Edit business settings & apps, Manage cardholder, View card transactions. You can enable them in My Profile -> Permissions.
- You’ll be re-directed to the Legacy tab.

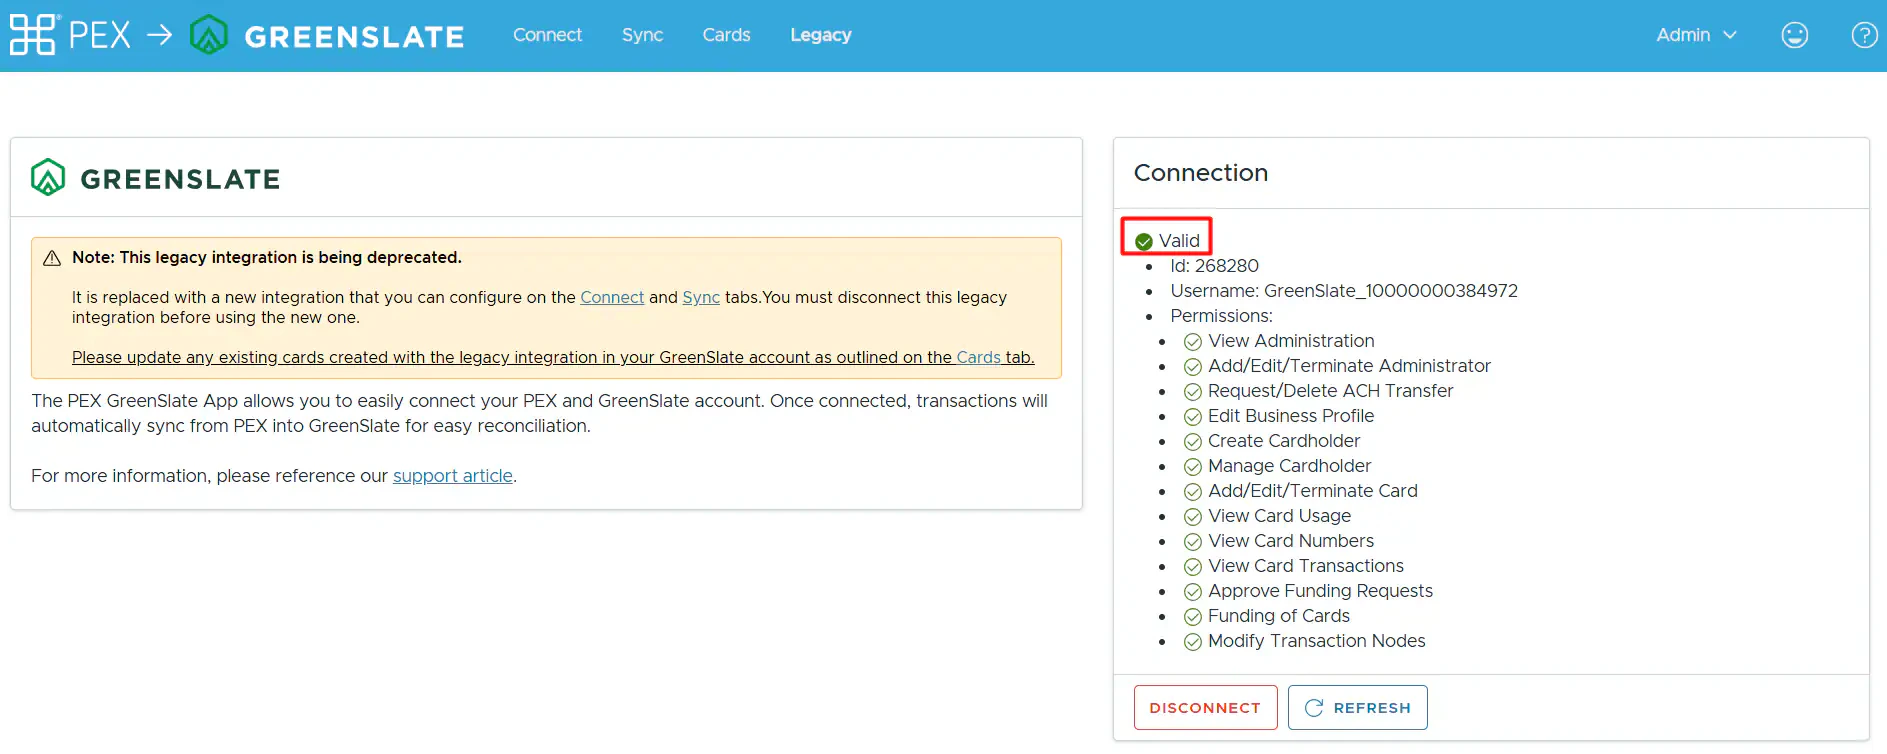
Note: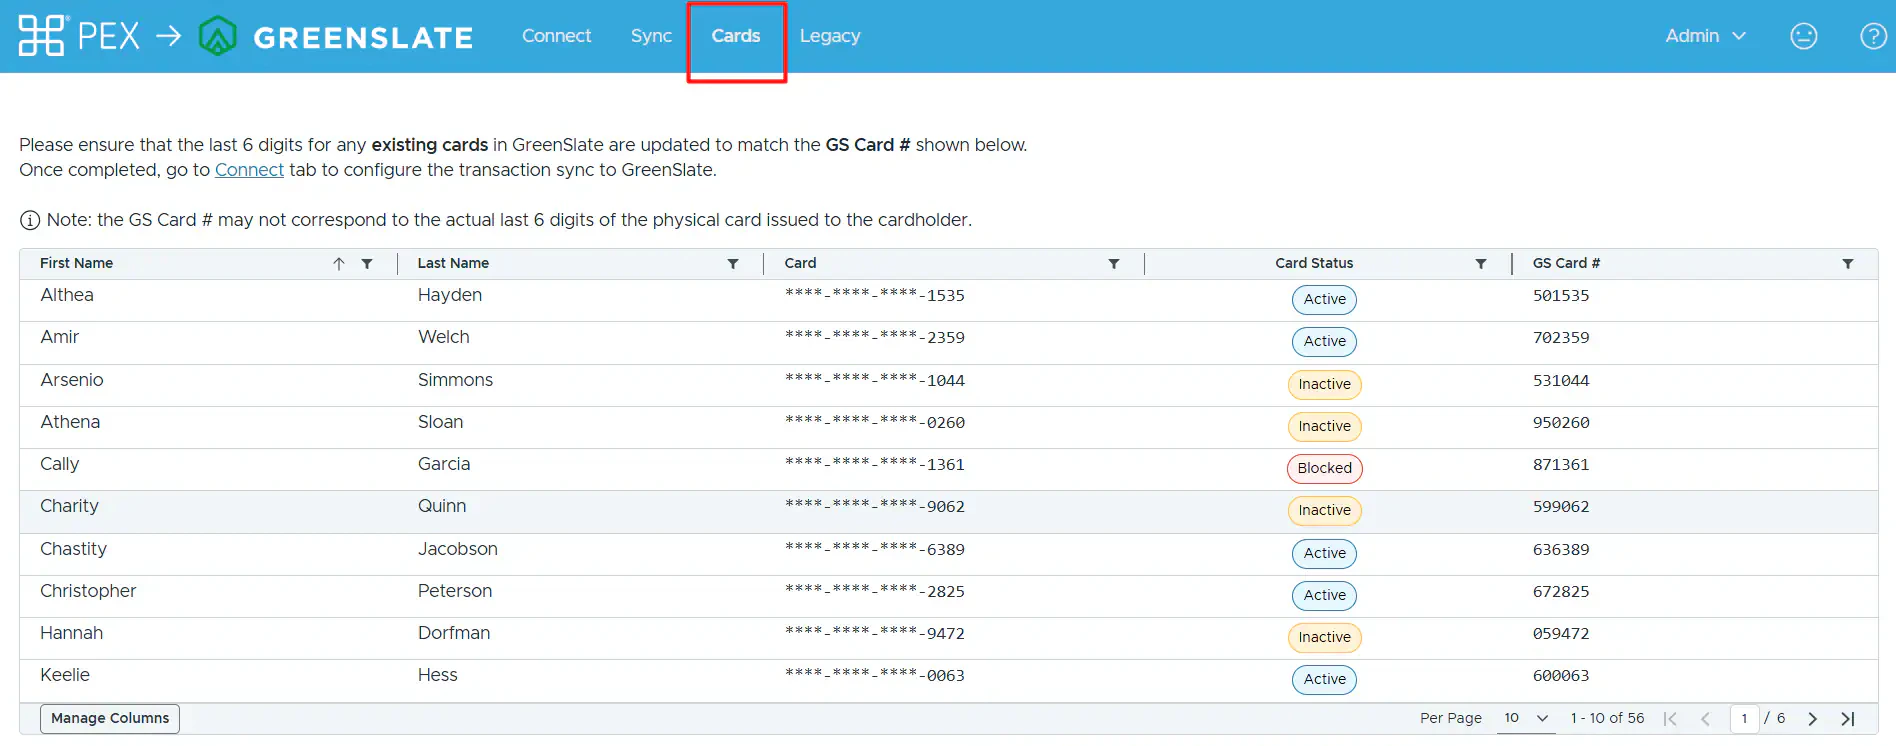
- You can use only one app at a time; you cannot be connected to the legacy app and the new app simultaneously.
- If you are an existing customer who used the GreenSlate connector before the new app was introduced, you will also have access to the Cards tab.
-
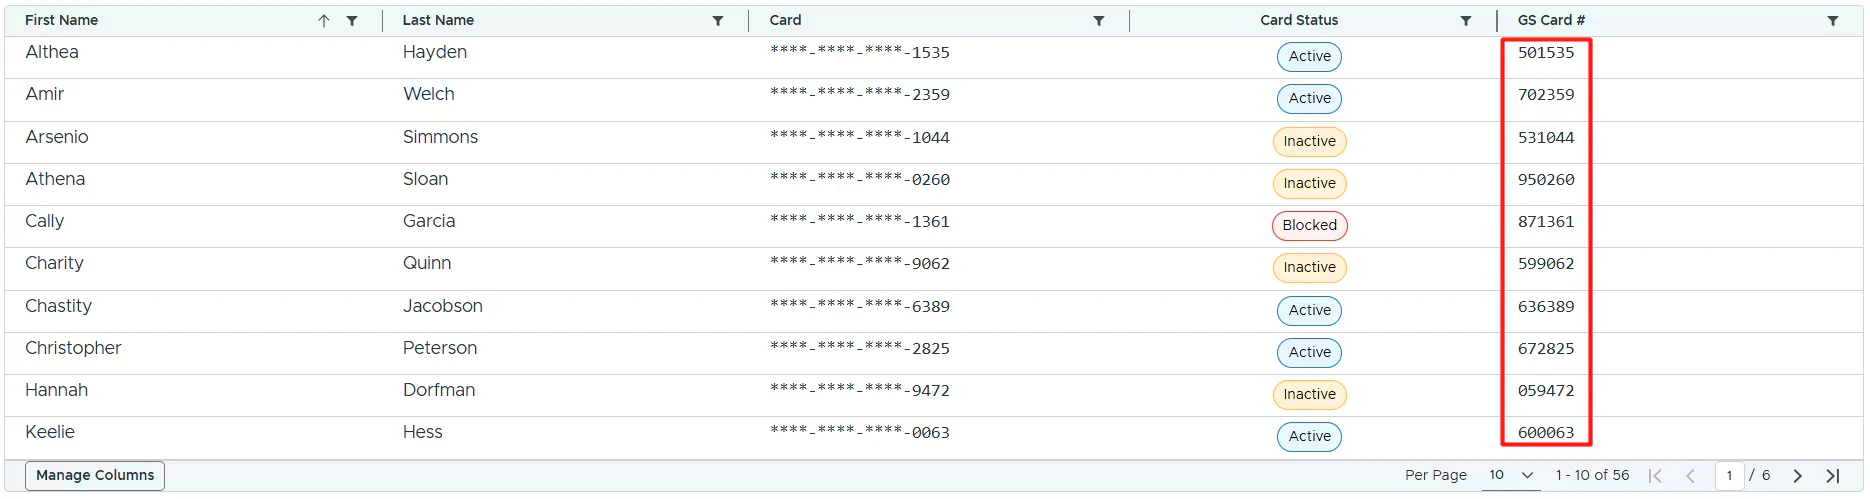
If you want to switch to using the new app, please ensure that the last 6 digits for any existing cards in your GreenSlate account match the GS Card # shown in your table. Otherwise, duplicate cardholders will be created in your GreenSlate account.
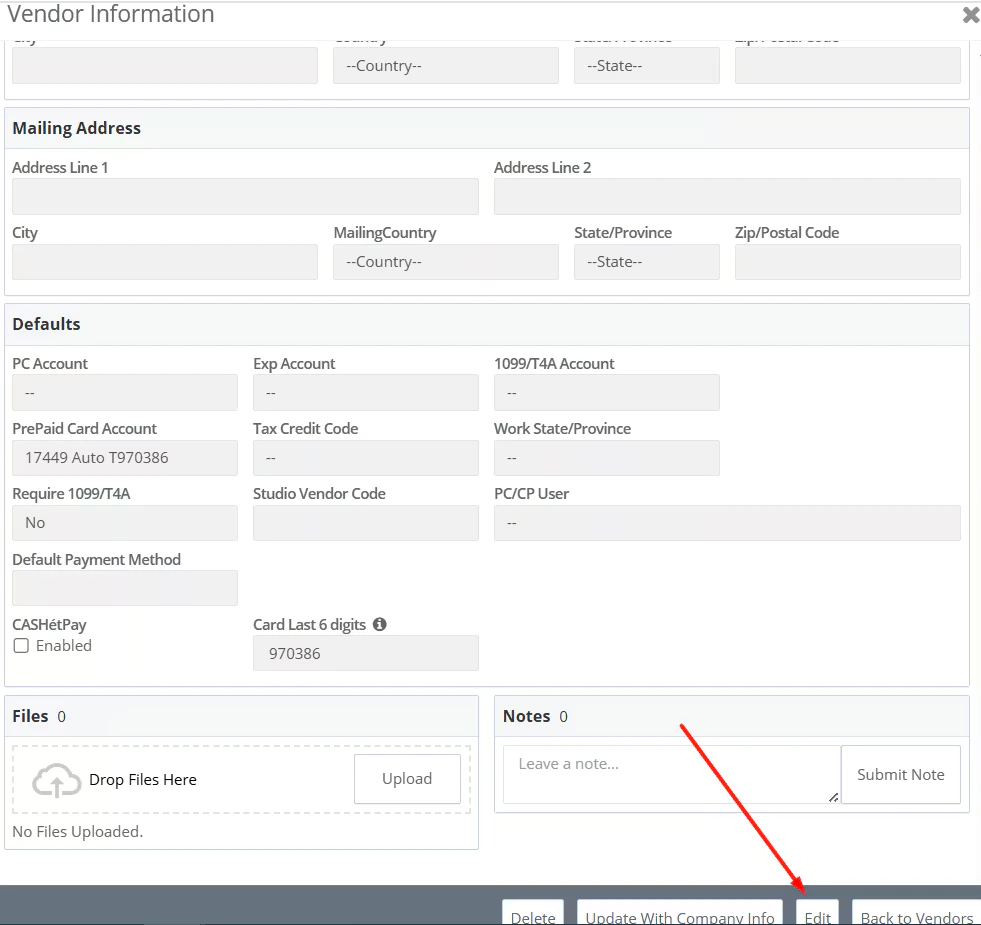
To update this in GreenSlate, go to Accounts Payable -> Vendors -> click “Actions” across the vendor name ->
 select “View Vendor Profile In Same Tab” or “View Vendor Profile In New Tab” -> scroll down to the bottom-> click Edit ->
 update the Card Last 6 digits field with GS Card # shown in your table for that particular cardholder ->

Connect PEX and GreenSlate
To connect your PEX and your GreenSlate accounts from the PEX Marketplace using the new app follow these steps:Log in to http://dashboard.pexcard.com/
Navigate to Apps > Available
Click More info > Install > Launch.You’ll be re-directed to a Legacy tab.
Note:To install the connector, you need to enable the following permissions: Edit business settings & apps, Manage cardholder, View card transactions. You can enable them in My Profile -> Permissions.
- We will add your GreenSlate project(s) to PEX.
- Once your GreenSlate project(s) have been added, we will send you an email so you can proceed with the configuration.
Configure Transaction Settings

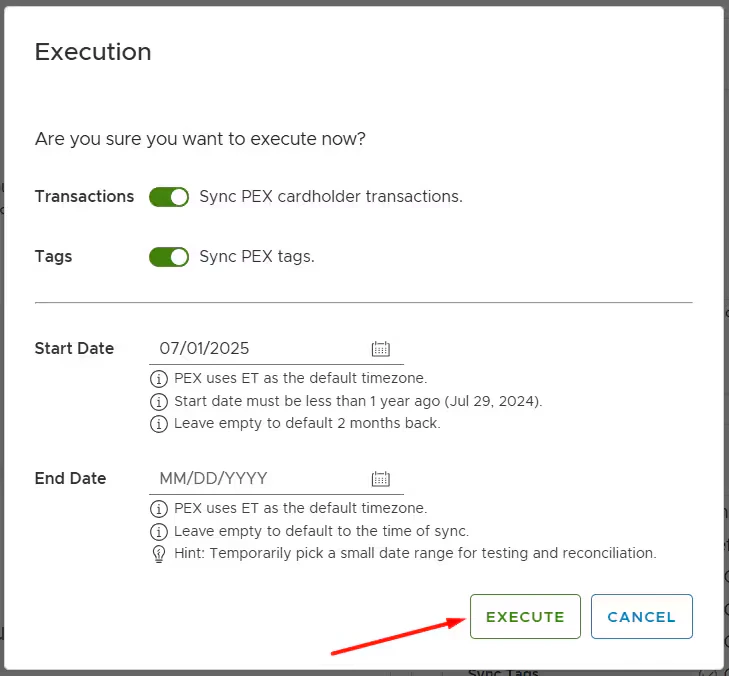
- Must be less than 1 year ago (if today is Aug 30, 2025 then you can not go further back than Aug 30, 2024).
- Leave empty to default 2 months back.
- Auto-sync will always process 2 months back.
- Leave empty to default to the time of sync.
- Temporarily pick a small date range for testing and reconciliation purposes.
- Select the envelope grouping
- Group transactions into an envelope per cardholder, project, and company.
- If Admins select this option, the connector creates one envelope per week, containing all purchases that are ready to sync. For example, transaction A is made on July 15, and transaction B is made on August 2. Transaction A is tagged and approved on August 3, and transaction B is tagged and approved on August 4. Both transactions will sync to the same envelope.
- Create a single envelope per cardholder transaction.
- Group transactions into an envelope per cardholder, project, and company.
- Sync all transactions or only approved transactions
- “Only sync approved transactions” means that transactions must be approved in PEX before syncing to GreenSlate.
- Sync attachments
- If this box is checked, purchase receipts will sync to GreenSlate.
- Use settlement dates or purchase dates
- Transactions sync only once settled, but you can choose either the settlement or purchase date as the posting date in GreenSlate.
Purchases
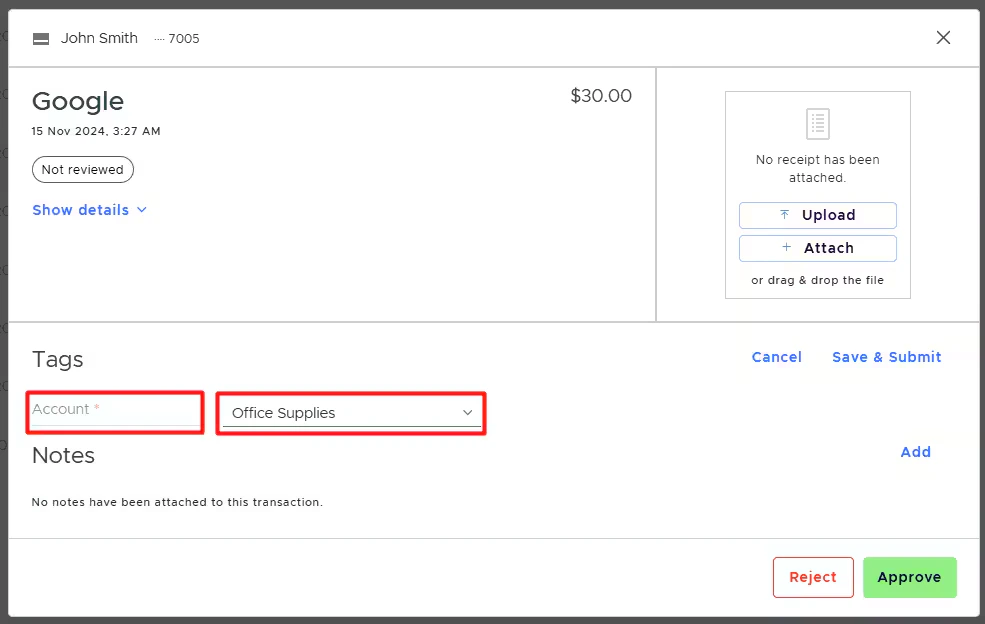
To sync purchases to GreenSlate, configure the field mapping. Purchase Field Mappings Map GreenSlate fields so the connector knows which values to use when syncing purchases to GreenSlate. Fields can be mapped to static values or PEX tags. If you choose to use PEX tags, you must create them in advance, following the logic described in the “Create PEX tags for GreenSlate” article. For example, the “Account” is one of the fields on your Purchase:- Mapping the “Account” field to a static value means that you can select one account out of the many presented in GreenSlate, and that value (“Advertising” in our example below) will be applied to all PEX purchases.

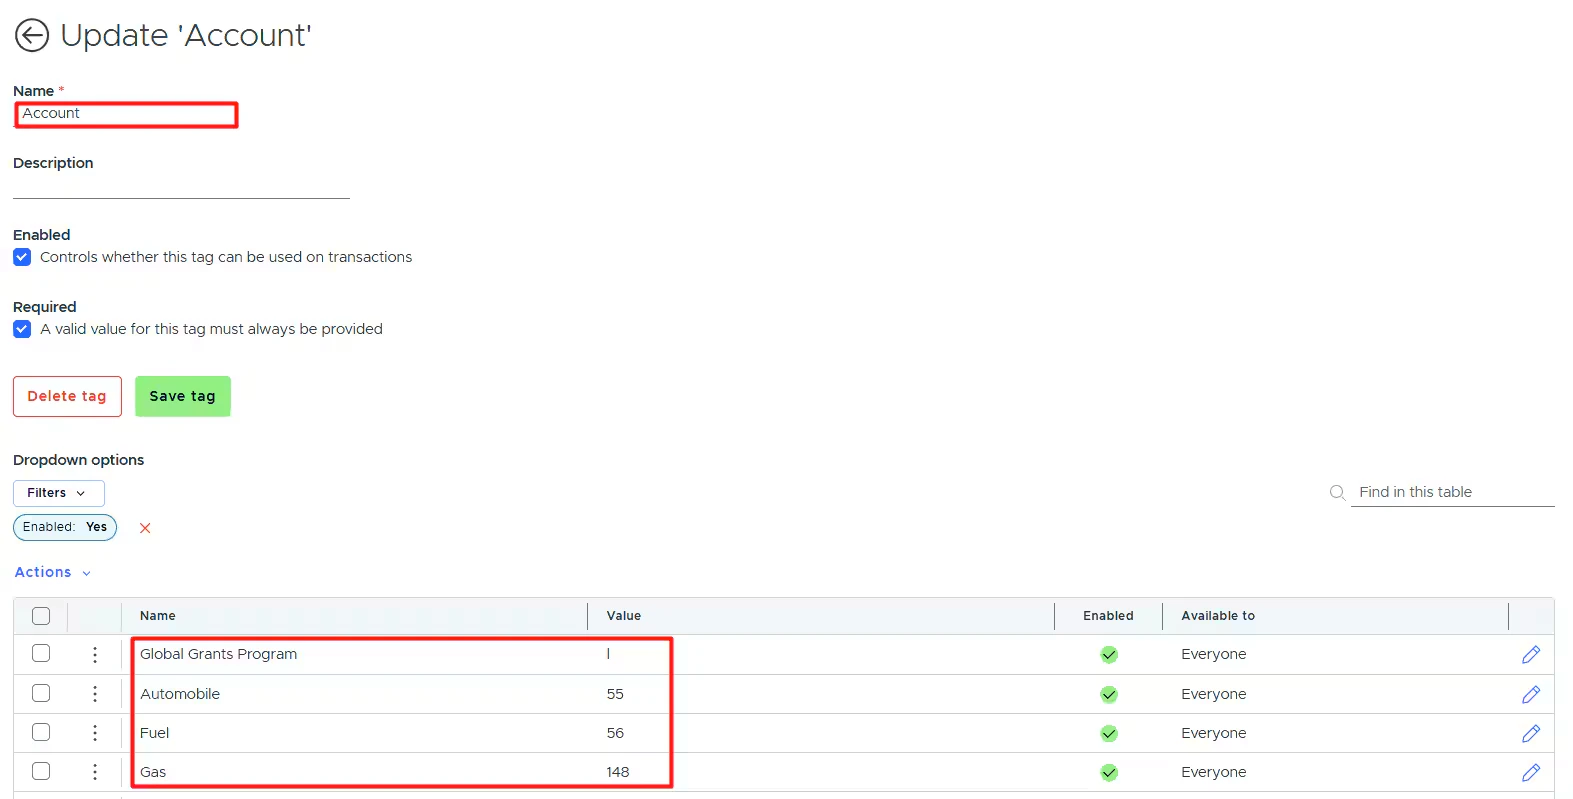
- Mapping the “Account” field to a PEX tag (“Account” in our example below) means that you and your cardholders can select one of the tag values for each purchase.


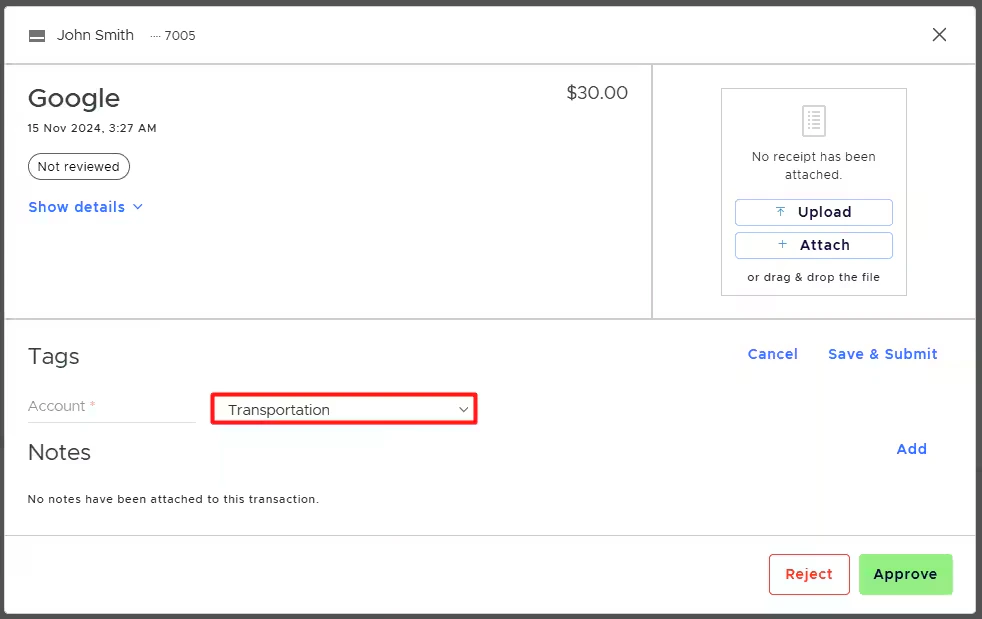
- Enable the sync toggle to sync field values from GreenSlate into PEX as tag options.

Cardholder fees
To sync cardholder fees to GreenSlate, enable the toggle Sync cardholder fees.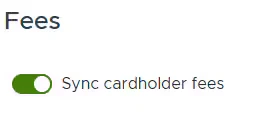
- Mapping the “Account” field to a static value means that you can select one account out of the many presented in GreenSlate, and that value (“Advertising” in our example below) will be applied to all PEX fees.

- Mapping the “Account” field to a PEX tag (“Account” in our example below) means that you and your cardholders can select one of the tag values for each fee.


Cardholder Fundings
To sync cardholder fundings to GreenSlate, enable the toggle Sync cardholder fundings.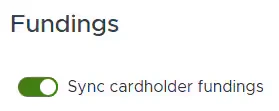

Note:
- The above mappings apply to all your cardholders.
- Cardholder funding transactions sync into their own envelopes—one envelope per funding per cardholder.
- Syncing cardholder fundings is only available to PEX prepaid businesses.
Sync to GreenSlate
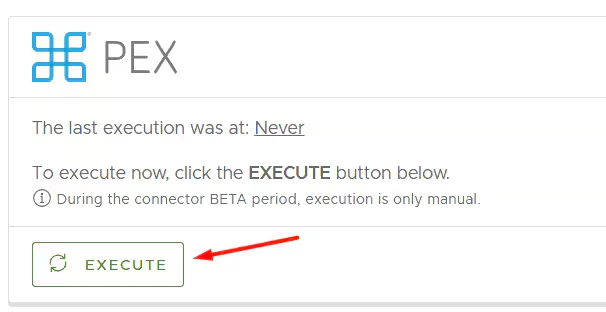
In the Sync tab, you can:- View the last synchronization time.
-
Manually sync transactions/tag options by clicking Execute.
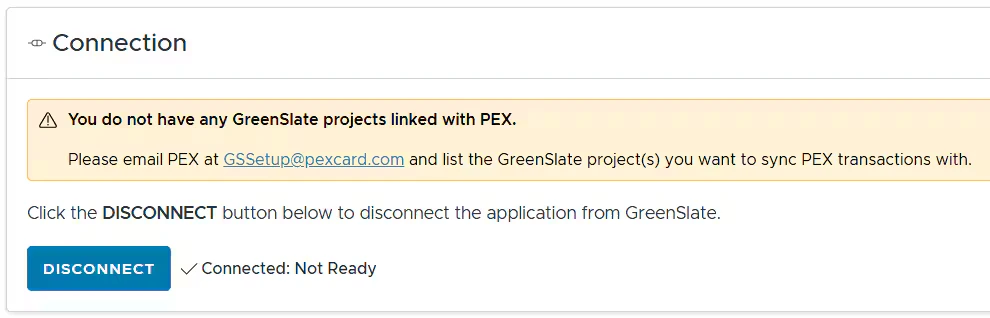
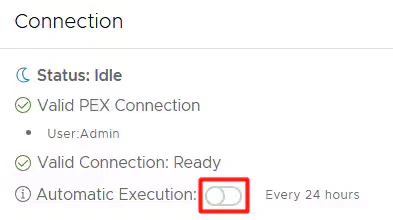
- View Connection info.
-
Enable/disable auto-sync. Auto-sync is not available during the connector BETA period.
- Enabled: Transactions sync automatically every 24 hours.
- Disabled: Transactions will not sync automatically.
- Disconnect.
-
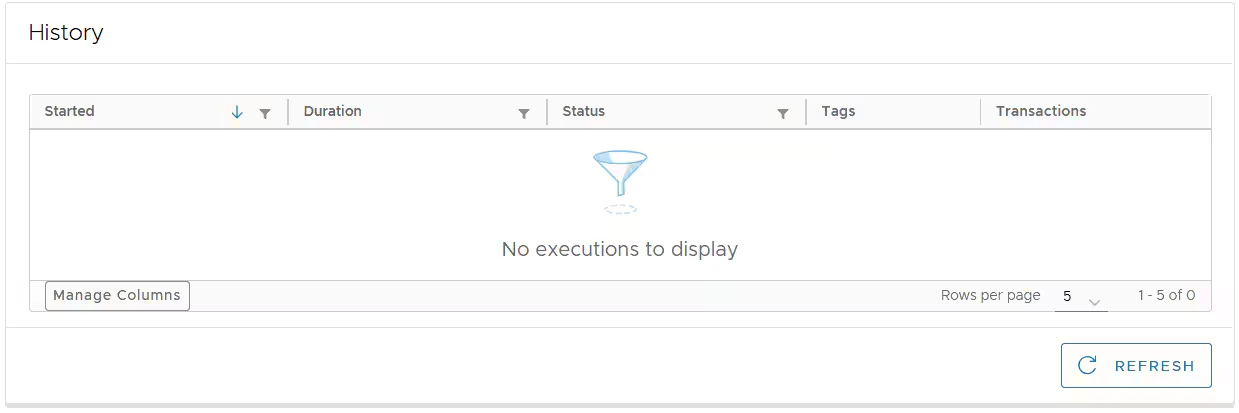
View the History of transactions synced to your GreenSlate account.
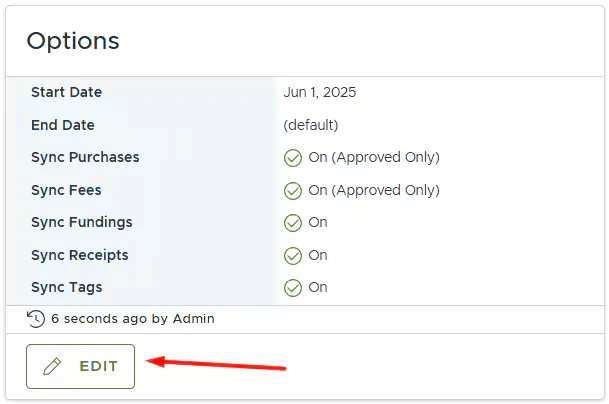
- View Settings information.
-
Edit settings if necessary.
Auto-sync will always process transactions based on the start date specified on the Connect tab, with a maximum limit of 2 months back from today. If there is no start date specified on the Connect tab then auto-sync will sync transactions up to 2 months back from today. Manual sync
Manual sync will process transactions based on the start date specified on the Execution screen, with a limit of 1 year back from today. If the start date is left empty on the Execution screen, the manual sync will process transactions only up to 2 months back from today.
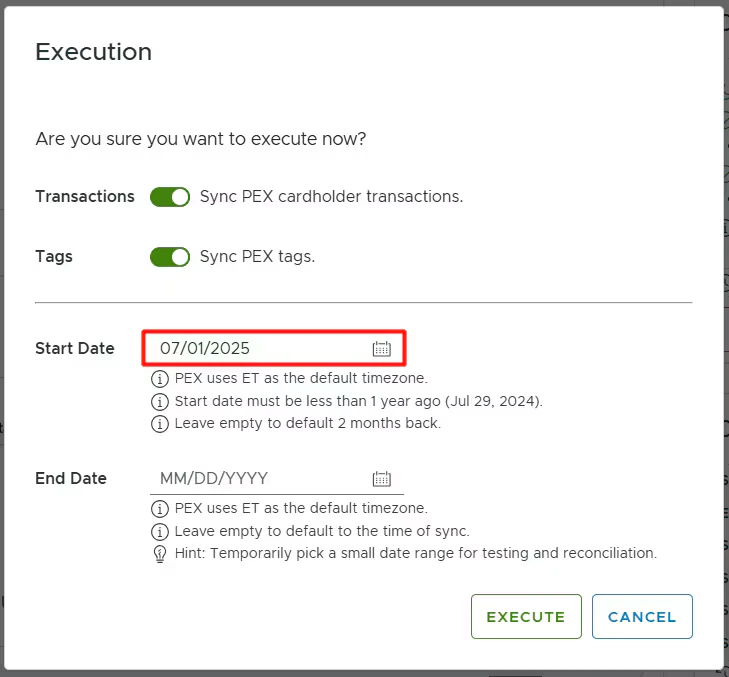
Note:By default, the start date on the Execution screen is set to the first day of the current month.
AUTO TAGGER
The Auto Tagger app is a great compliment to GreenSlate. It allows you to create rules that auto-tag purchases. Learn more.View Synced Transactions in GreenSlate
Log into your GreenSlate account and navigate to My Profile-> My PCard Envelopes -> All tab to view synced transactions.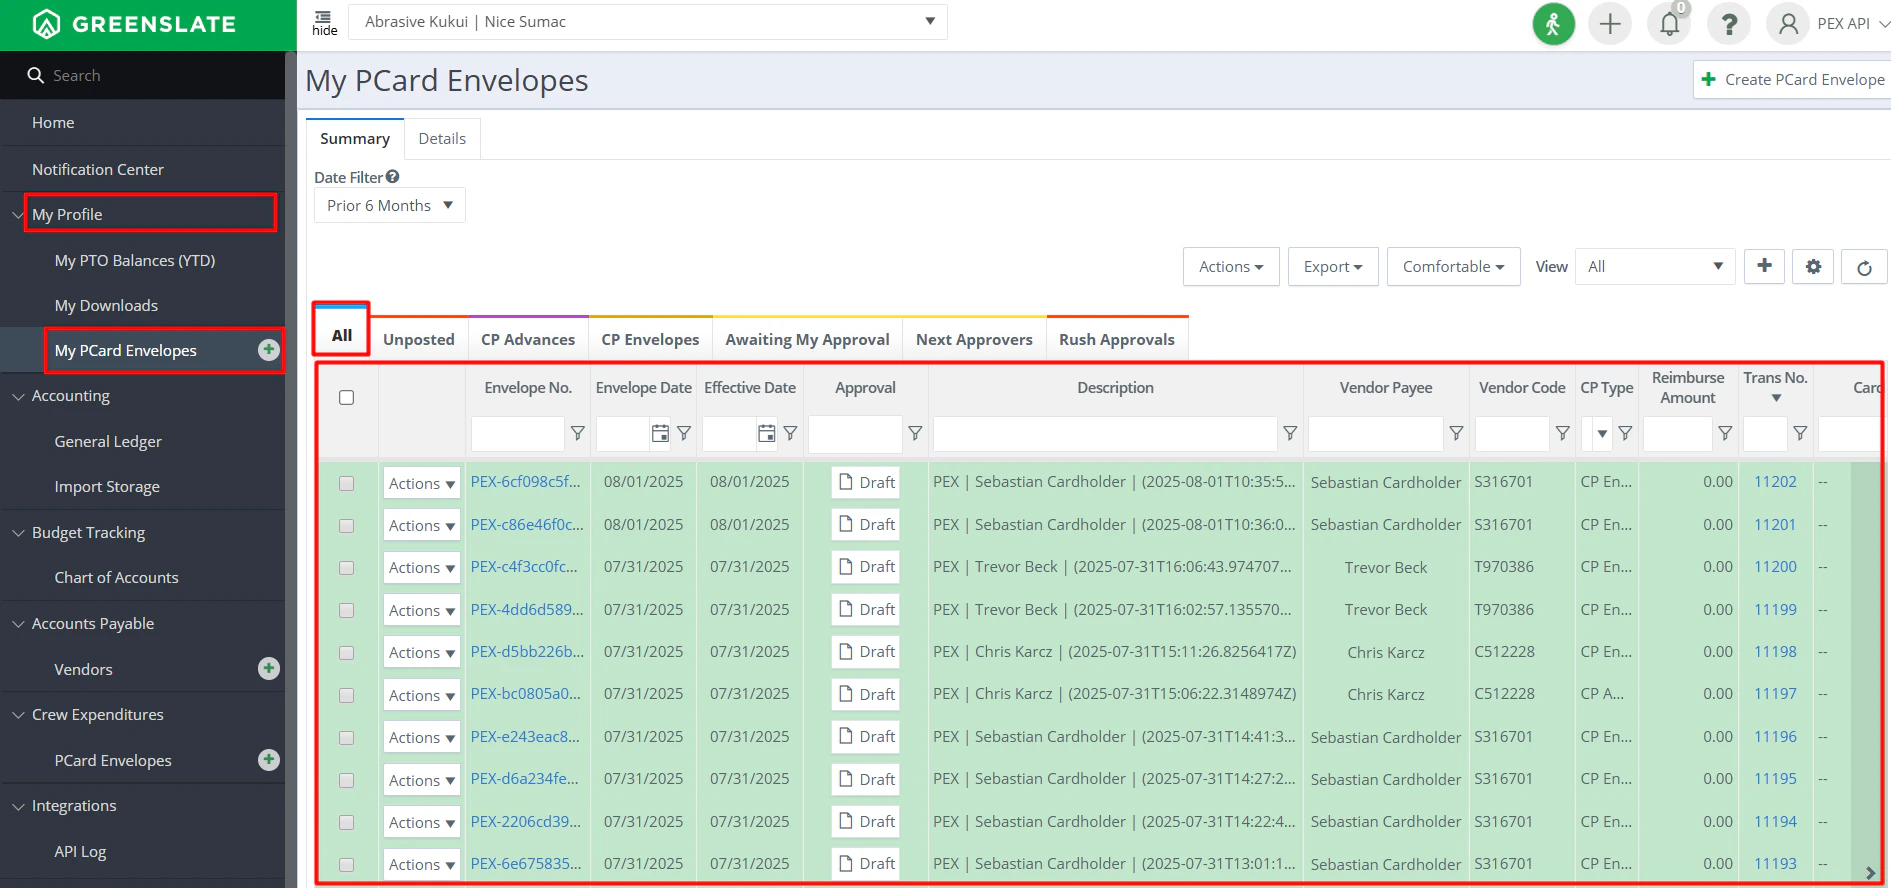
View Synced Receipts in GreenSlate
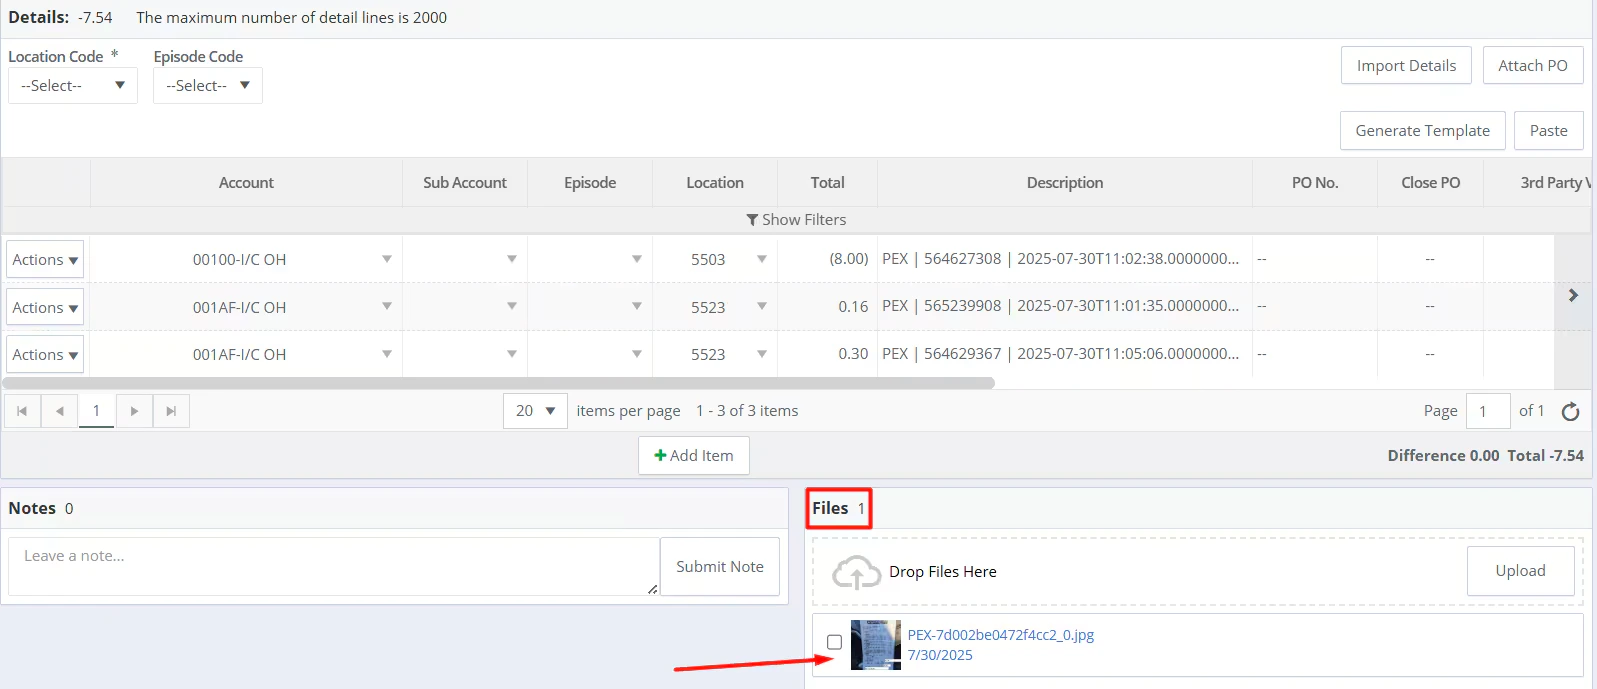
Log into GreenSlate account and navigate to My Profile-> My PCard Envelopes -> All tab ->

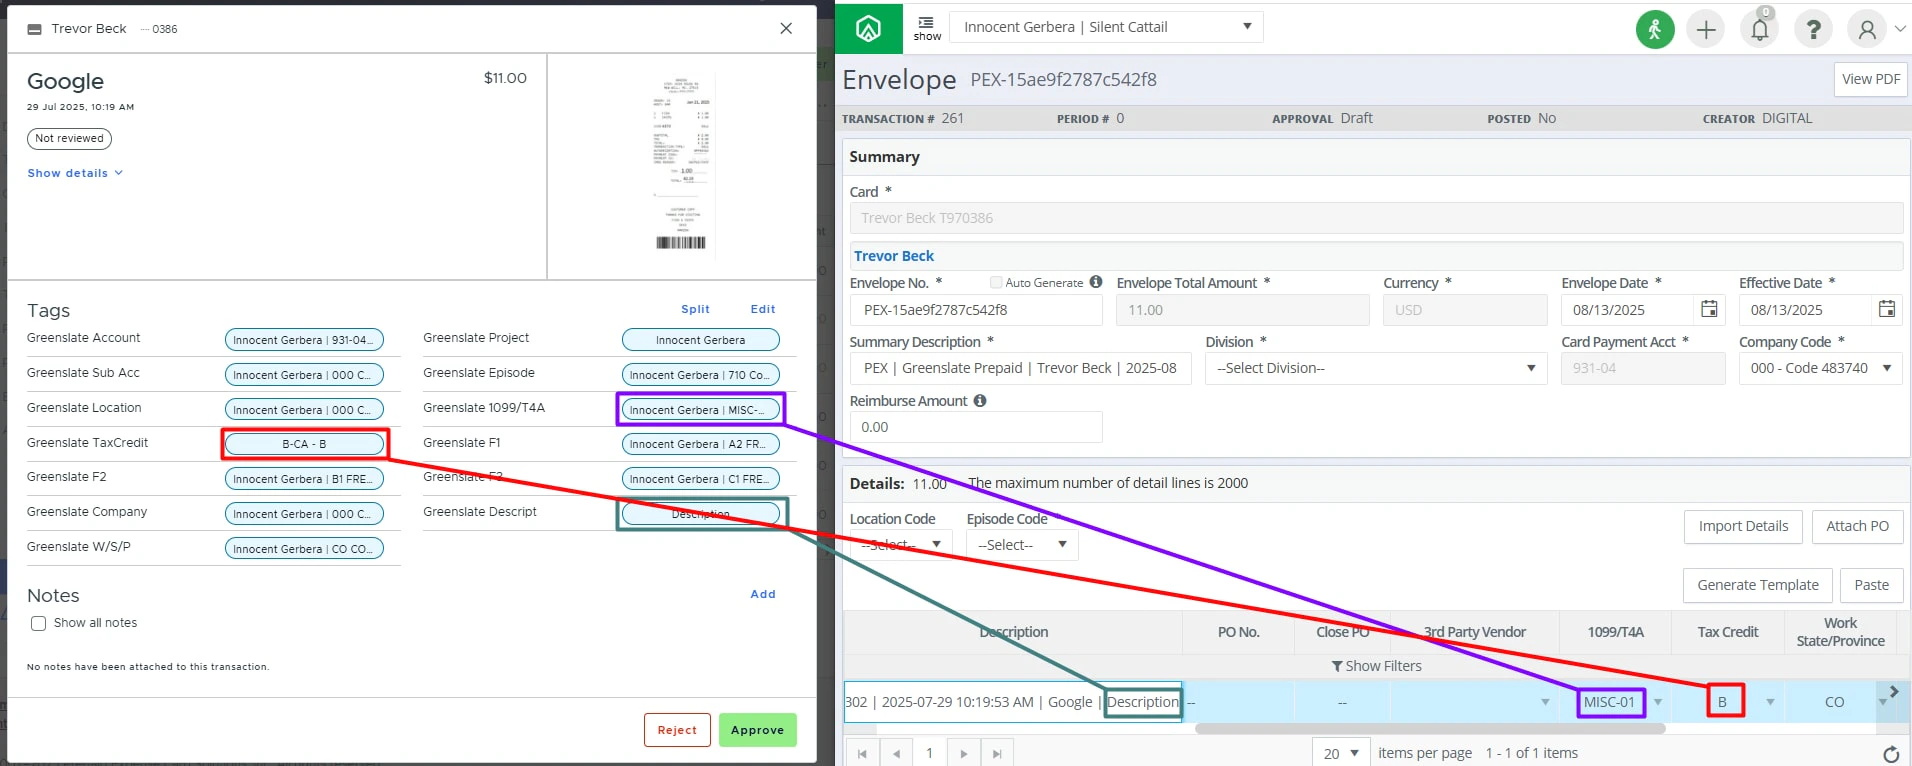
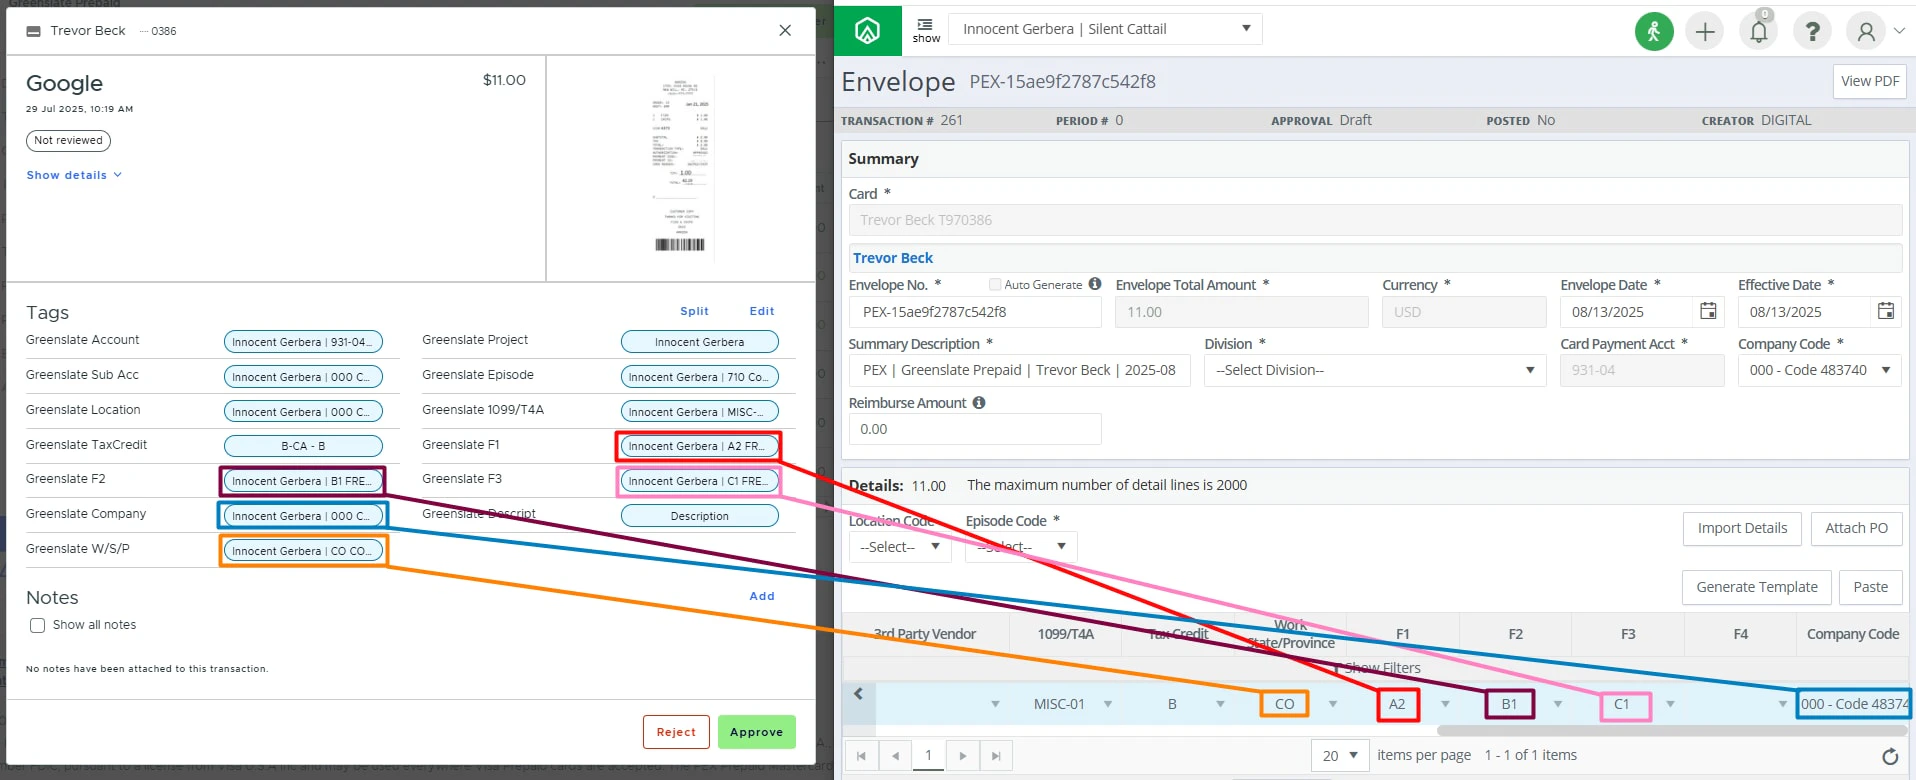
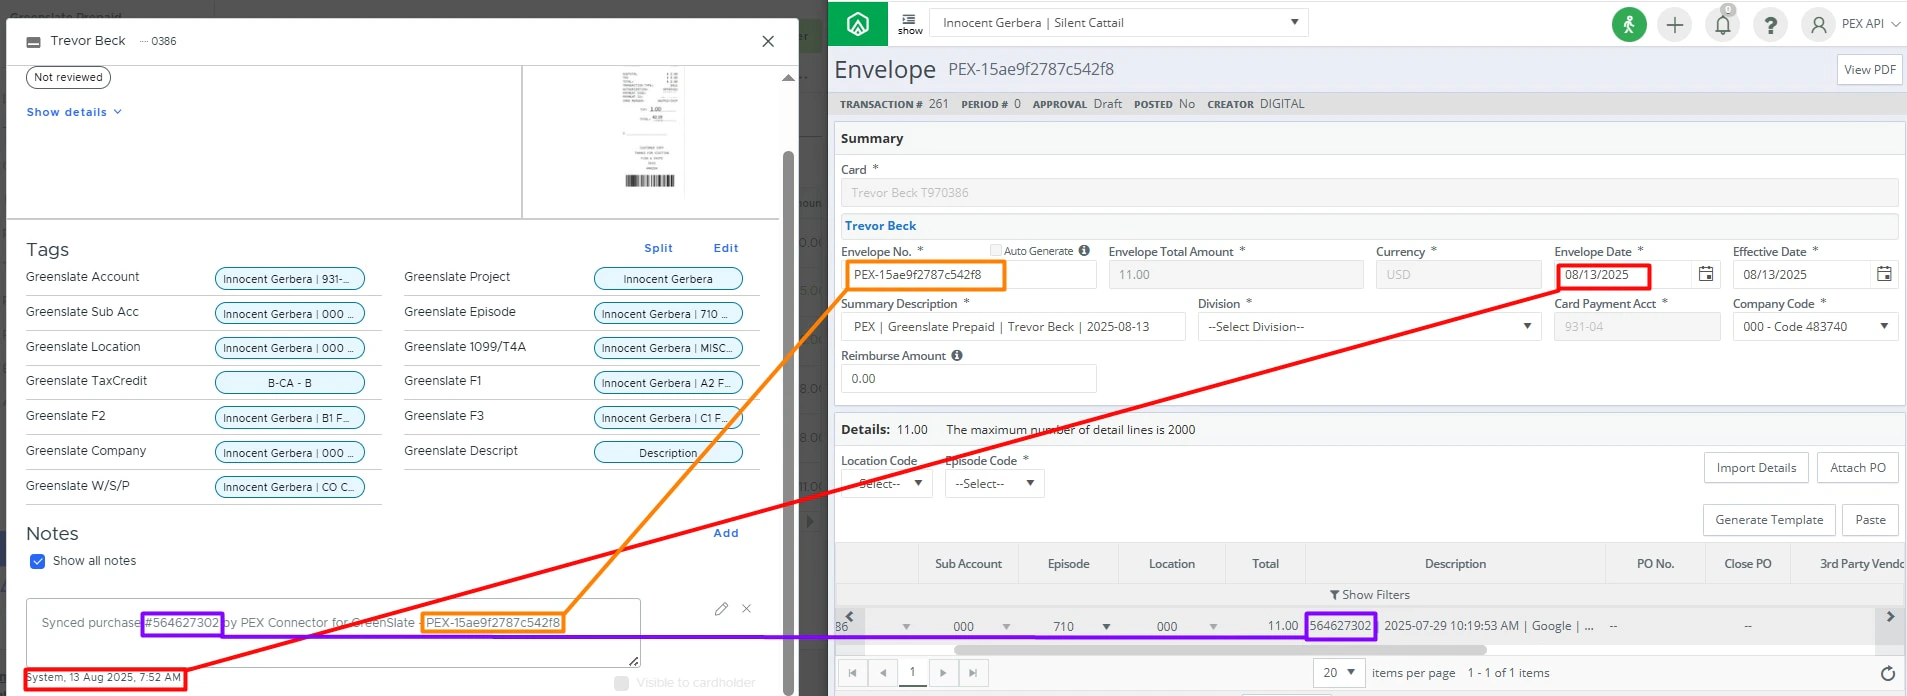
How does data flow between PEX and GreenSlate?
If everything is configured correctly and transactions are tagged, PEX will sync the following data points to GreenSlate:- Cardholder name and last 6 digits
- Merchant name (Description field in GreenSlate)
- Transaction date and time (Description field in GreenSlate)
- Transaction amount
- Project name
- Account

- Sub Account
- Episode
- Location
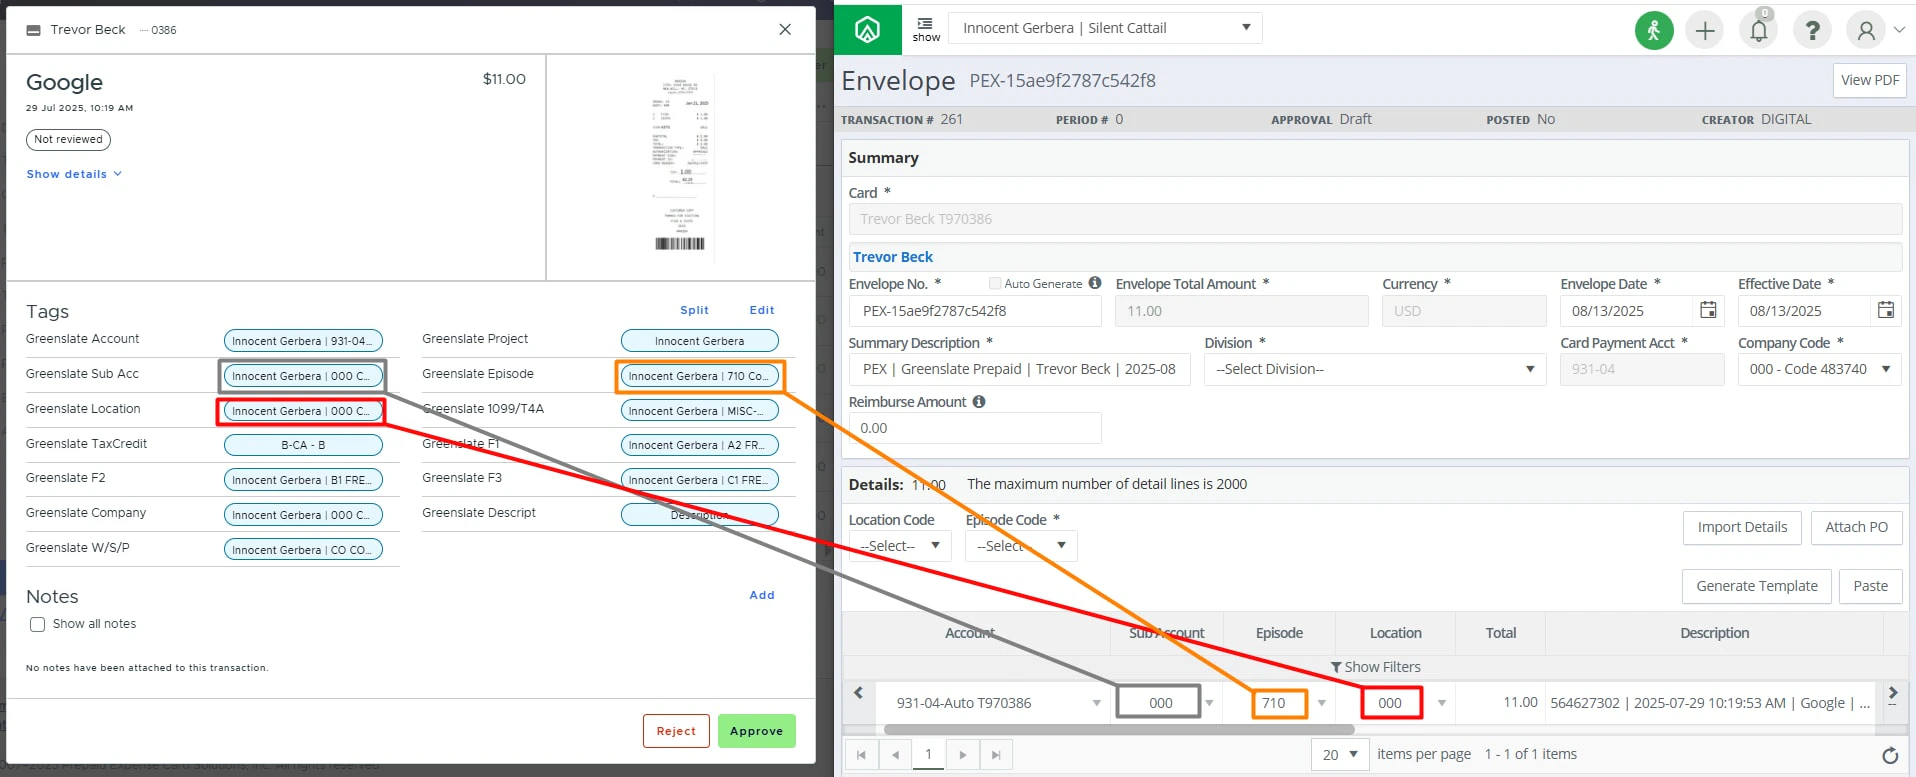
- 1099/T4A
- Tax Credit
- Description
- F1
- F2
- F3
- Company Code
- Envelope No.
- Transaction ID
- Sync date
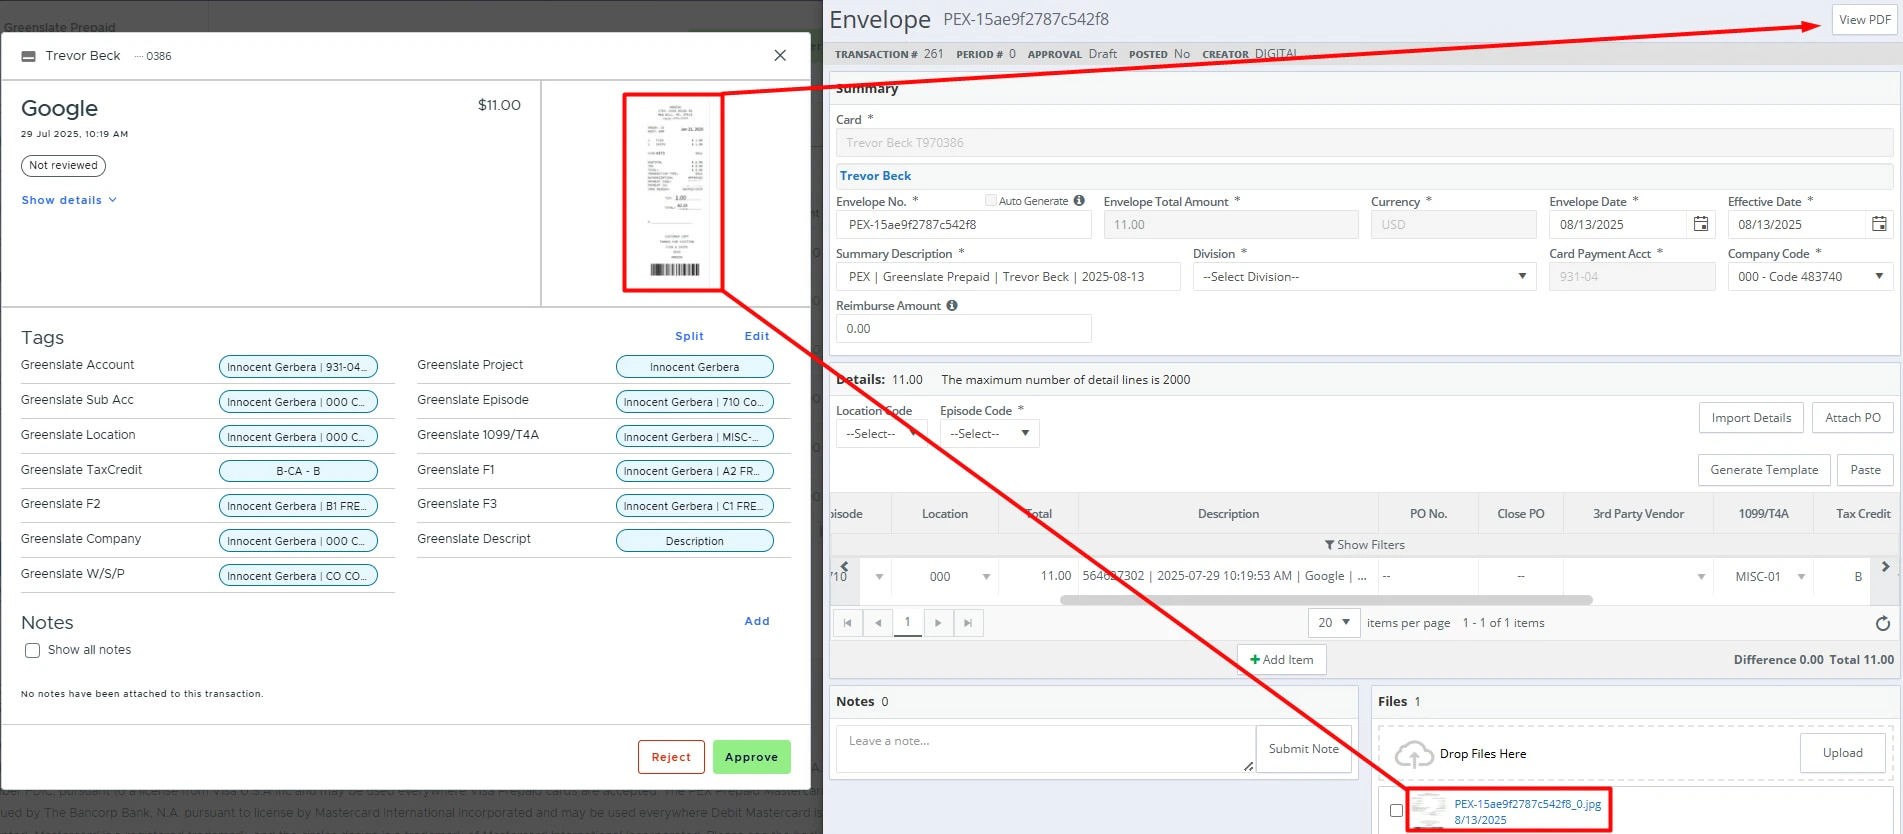
- Receipt file
FAQ
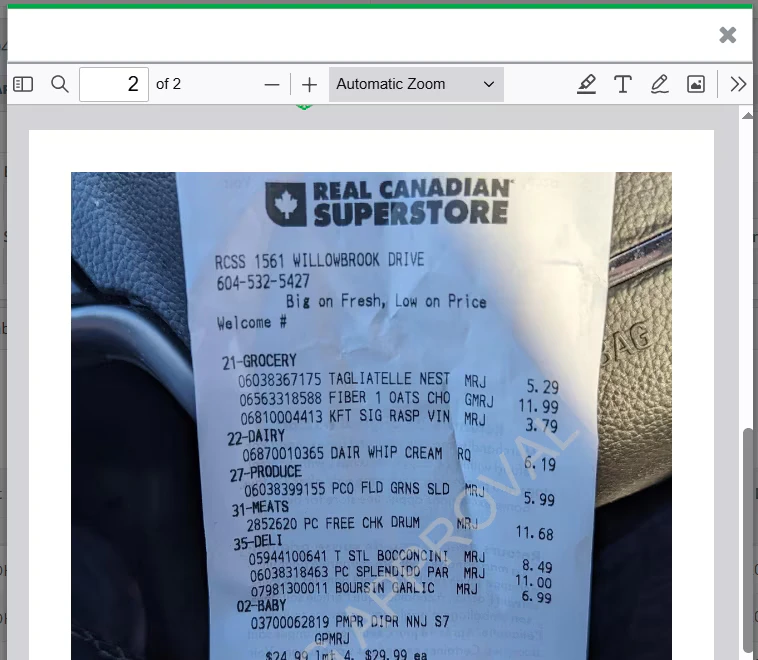
How do receipt images show up in GreenSlate?
How do receipt images show up in GreenSlate?
Receipt images are stored directly in the GreenSlate PCard Envelopes to serve as your system of record.
Can I enable auto-sync?
Can I enable auto-sync?
Auto-sync is not available during the connector BETA period.
Do pending transactions get synced?
Do pending transactions get synced?
No, only settled transactions are synced. If you see a “Pending” label next to the merchant name as shown on the screen below, then the transaction is still in the pending status.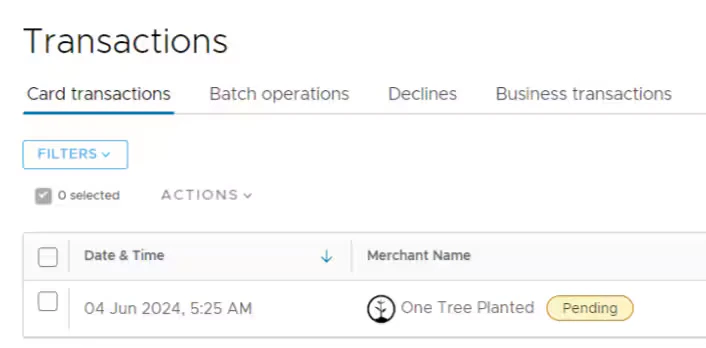
Can I combine manual and automatic tag sync from GreenSlate to PEX?
Can I combine manual and automatic tag sync from GreenSlate to PEX?
We strongly recommend using automatic sync of tag options from GreenSlate to PEX. This will keep your PEX tags and GreenSlate fields in sync. For more information, check out the support article “Create PEX tags for GreenSlate”.
Will a previously synced transaction re-sync to my GreenSlate account if I change its status (Rejected -> Approved), re-tag or add another receipt?
Will a previously synced transaction re-sync to my GreenSlate account if I change its status (Rejected -> Approved), re-tag or add another receipt?
No, if you need to resync a transaction, please contact the PEX support team.
What type of cardholder transactions sync?
What type of cardholder transactions sync?
PEX only syncs active cardholders. Any deleted or inactive cardholder transactions will not sync. We recommend syncing all existing purchases before closing/deleting a PEX card.