Configuring the PEX Connector for Zoho Books
To access the PEX Connector for Zoho Books, please click here or visit the ZohoBooks app store and search for PEX Connector.Note:To install the connector, you need to enable the following permissions: Edit business settings & apps, Manage cardholder, View card transactions. You can enable them in My Profile -> Permissions.
Authenticate with PEXClick the top button to log in to your PEX account. This will open a window. You should use the same credentials you use to log in at https://dashboard.pexcard.com. If you do not have a PEX business account already, click the button to apply for one. If you have a PEX business account but do not have an administrator login, please contact your organization’s PEX administrator for a new account.
Connect to your Zoho Books accountAfter you log in to your PEX account, click on the ‘Connect to Zoho Books’ to connect to your Zoho Books account.
Choose Zoho Books organization from the drop down list that you want to connect with your PEX account.
Choose which items you would like to sync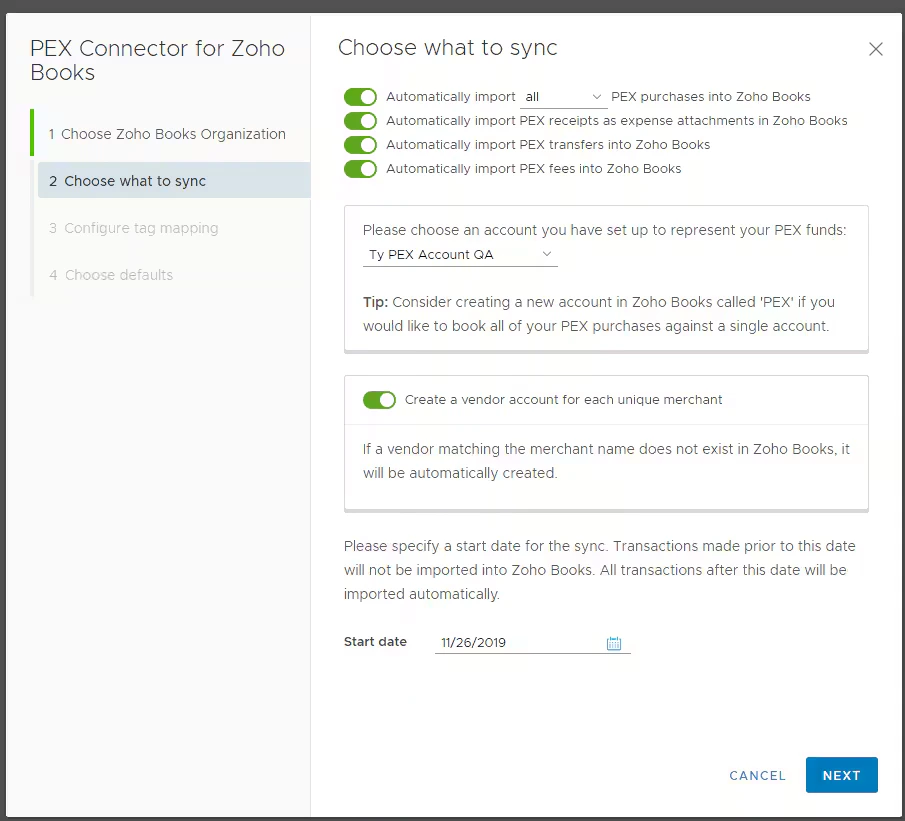
- Enable the first option to allow PEX to import PEX purchases as expenses in Zoho Book. You can choose if you wish to sync all PEX transactions (regardless of approval status) or just approved ones.
- For details on transaction review, please see How to Review Transactions
- Enable the second option to import PEX receipts as expense attachments in Zoho Books.
- Enable the third option to have PEX import Transfers to your Zoho Books account. An example of a transfer would be an ACH/Wire transfer from your Business Checking account to your PEX business account.
- Enable fourth option to have PEX account fees (E.g. Card expedite fees or monthly maintenance fees) in to Zoho Books
- Choose an account from the drop down list which is set up for your PEX business account in Zoho Books.
- Enable the fifth option if you want to automatically create a unique vendor in your Zoho Books company file for each PEX transaction merchant. If you do not choose this option, all PEX transactions will be booked against a single vendor selected from the drop down option.
- Specify a start date for the sync. Transactions after this date will be synced.
Configure Tag MappingTransaction tags are available with selected plans. For more information about tags, please see How to Setup and Create Tags with Tag Manager. Customers without tags will be asked to choose a default category for all transactions.Note that assigning an Expense Account is mandatory for transactions to be imported from PEX to Zoho Books.
- PEX tags can be mapped to Zoho Books fields for automatic classification of transactions
- Expense Account should be mapped to a PEX tag. You must provide a tag mapping for Expense Account.
- If you use Customer in your Zoho Books Online account, you can also map to specific PEX tag.
- Note: ‘Expense Category’, and ‘Customer’, can be mapped only to the PEX tags with type set to ‘Dropdown’.
- Sync Tag Options from Zoho Books gives an option to import data from your Zoho Books Account when configuring your PEX tags
- For example, if you enable “Sync Tag Options from Zoho Books” for Expense Account, the values for the PEX tag will be populated with the names of all accounts where the type is Expense in your Zoho Books chart of accounts. This helps reduce manual efforts to populate PEX tags with the data from your Zoho Books account.
- Enabling ‘Sync Tag Options from Zoho Books’ will not cause duplicate values in corresponding PEX tag
- For example, if you enable “Sync Tag Options from Zoho Books” for Expense Account, the values for the PEX tag will be populated with the names of all accounts where the type is Expense in your Zoho Books chart of accounts. This helps reduce manual efforts to populate PEX tags with the data from your Zoho Books account.
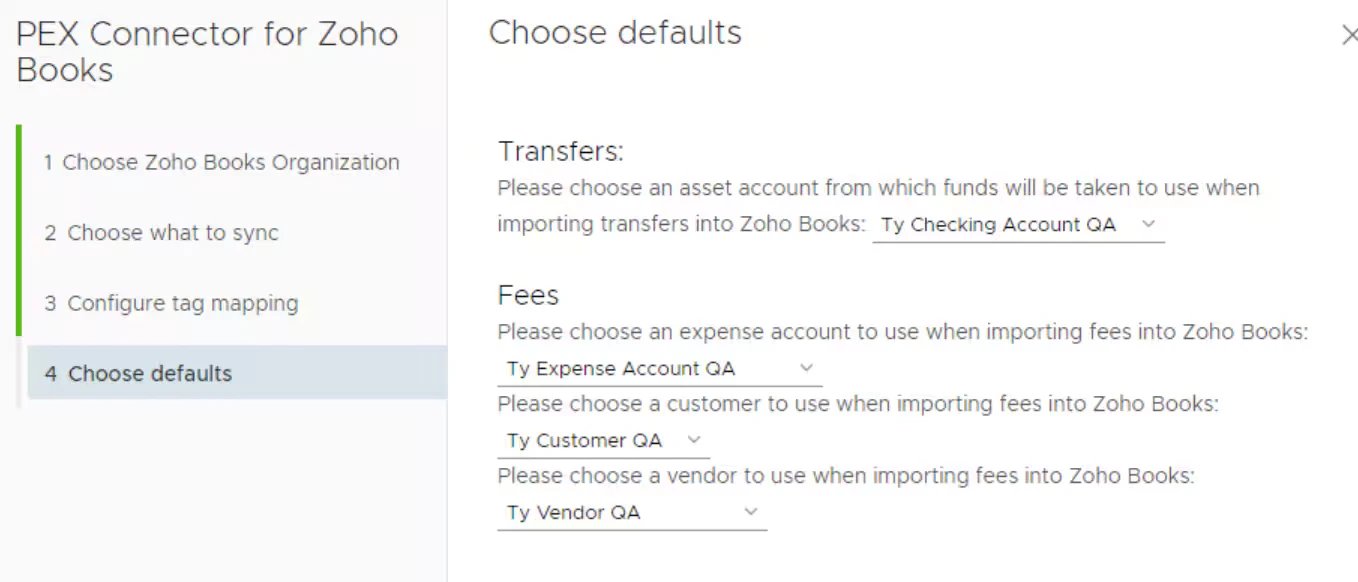
Choose Default values for Transfer and Fees.
- For Transfer transactions choose an asset account from which funds will be taken/debited while creating a transfer. Choose value from the Drop down list.
- to create Fees transaction in your Zoho Books
- Choose an expense account from the drop down list which will be applied for all the Fees.
- Choose a customer from the drop down list which will be applied for all the Fees.
- Choose the Vendor from the drop down list which will be applied for all the Fees.
- Choose an expense account from the drop down list which will be applied for all the Fees.
Managing the PEX Connector
Click on Manage Connector tab to- View/Edit configuration setting
- View/Edit tag mapping
- Disconnect from your Zoho Books account
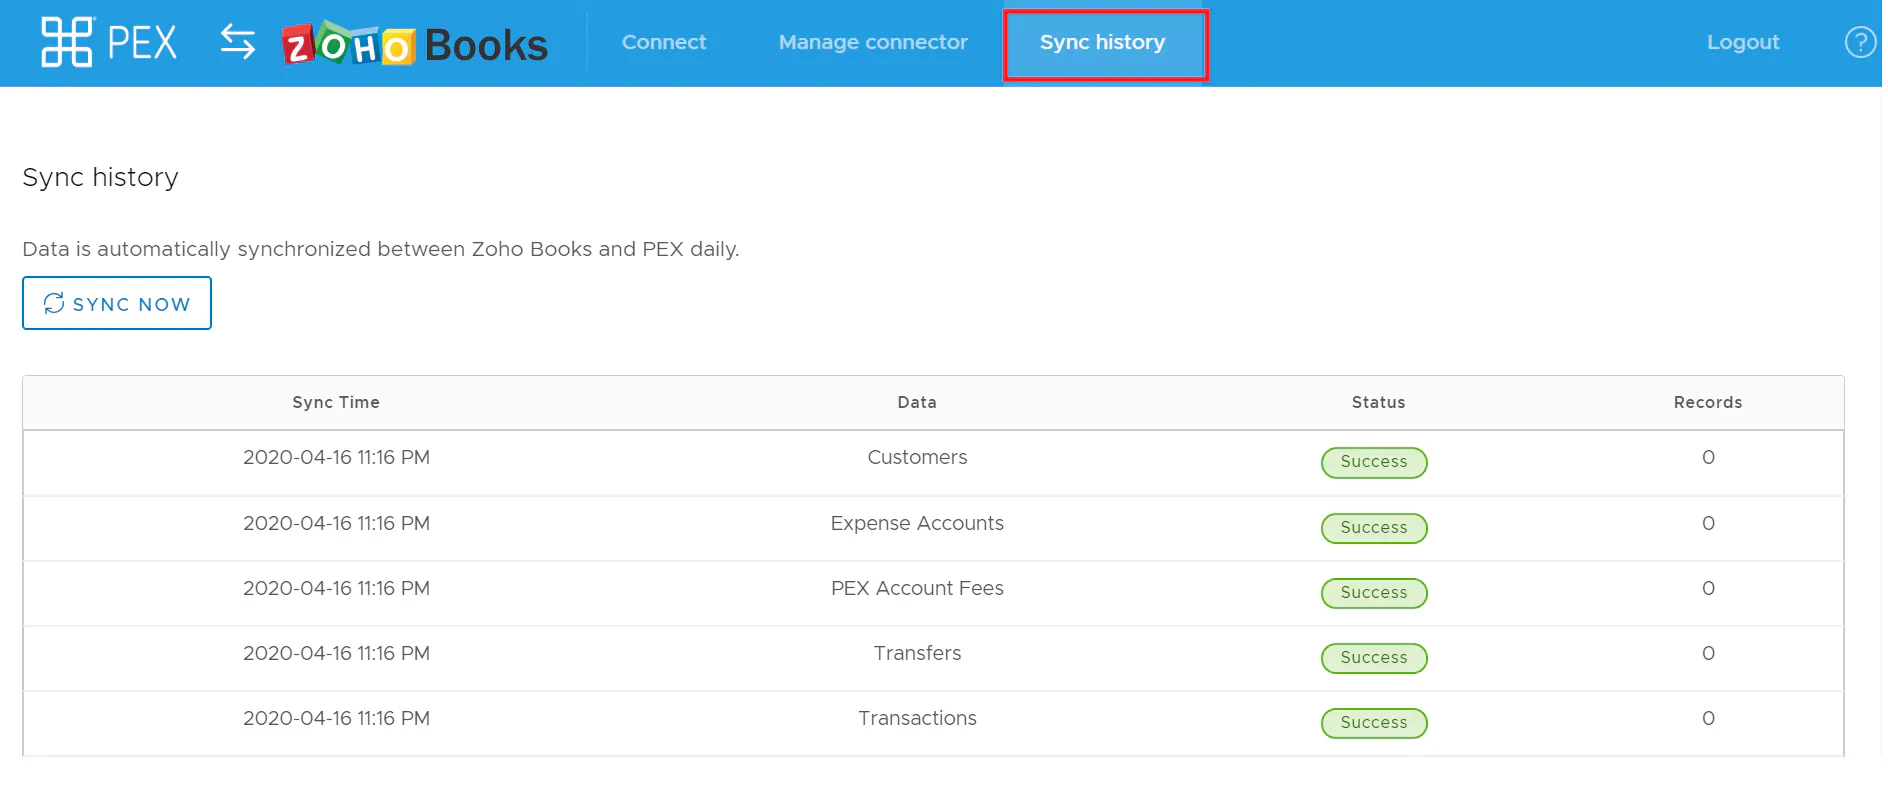
- View Sync history
- Trigger sync manually