Set up the PEX “bank account” in QuickBooks Online
Enter a descriptive name for the new account. We suggest “PEX”, “PEX Corporate Card”, “PEX Transactions”, or similar.If your PEX account is prepaid: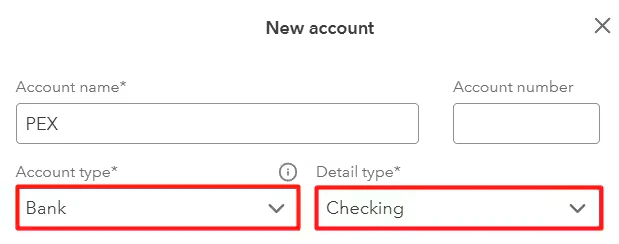
- Select Bank for the account type.
- Select Checking for the detail type.
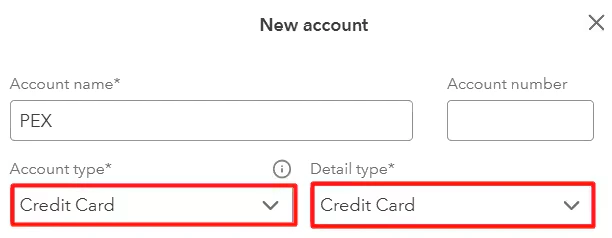
- Select Credit Card for the account type.
- Select Credit Card for the detail type.
Note:Many customers choose to use PEX as the bank name. If you have or may have multiple PEX accounts, consider using PEX along with the name of the business (e.g. PEX John’s Theater Co, PEX Kelly’s Events Inc). You should set up a PEX account in QuickBooks for each account before the first export of transactions can be completed.