PEX Split Tags enables you to allocate a single expense to multiple account codes or funding sources. This article guides you through the steps on how to use PEX Split Tags. 

Permissions

Your account need to be enrolled in PEX Pro pricing plan or higher to take advantage of PEX Tags and Split Tag functionality. If you are already using PEX tags with your PEX account, it’s easy to get the Split tag feature turned on. Please contact adminsupport@pexcard.com

How to enable Split Tags

Once your account is enabled for the Split tag by admin support, you will find the “Enable Split Tags” check box in Tag manager. Check the box. 
PEX: How to Enable Split Tags

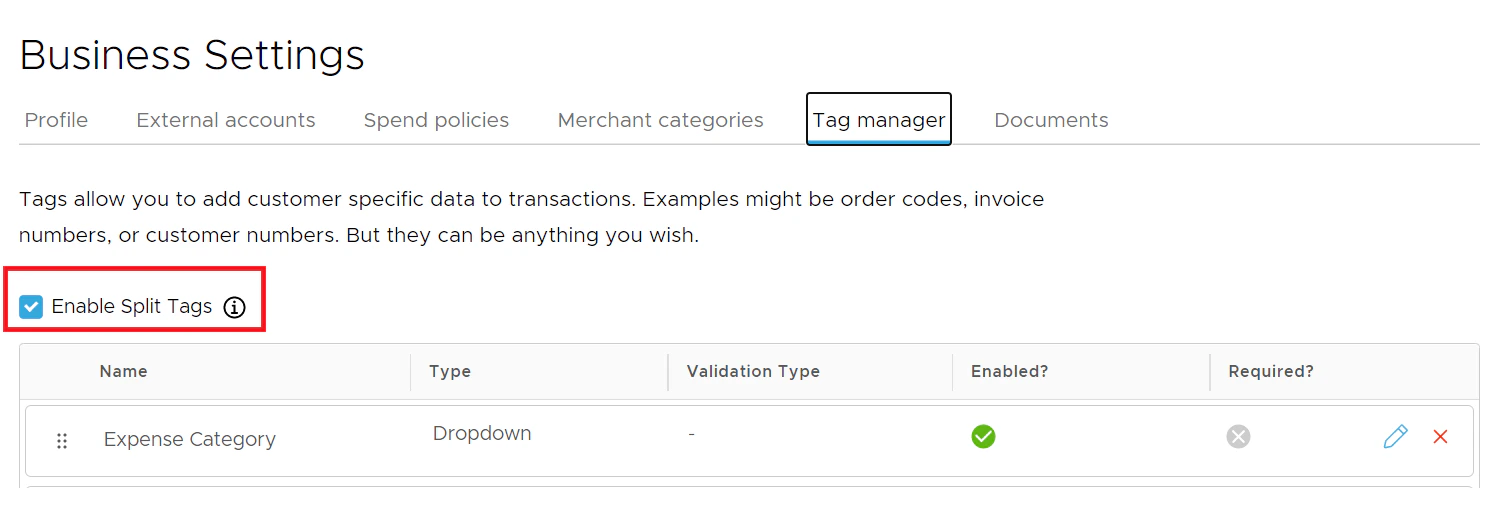
How to use Split Tags

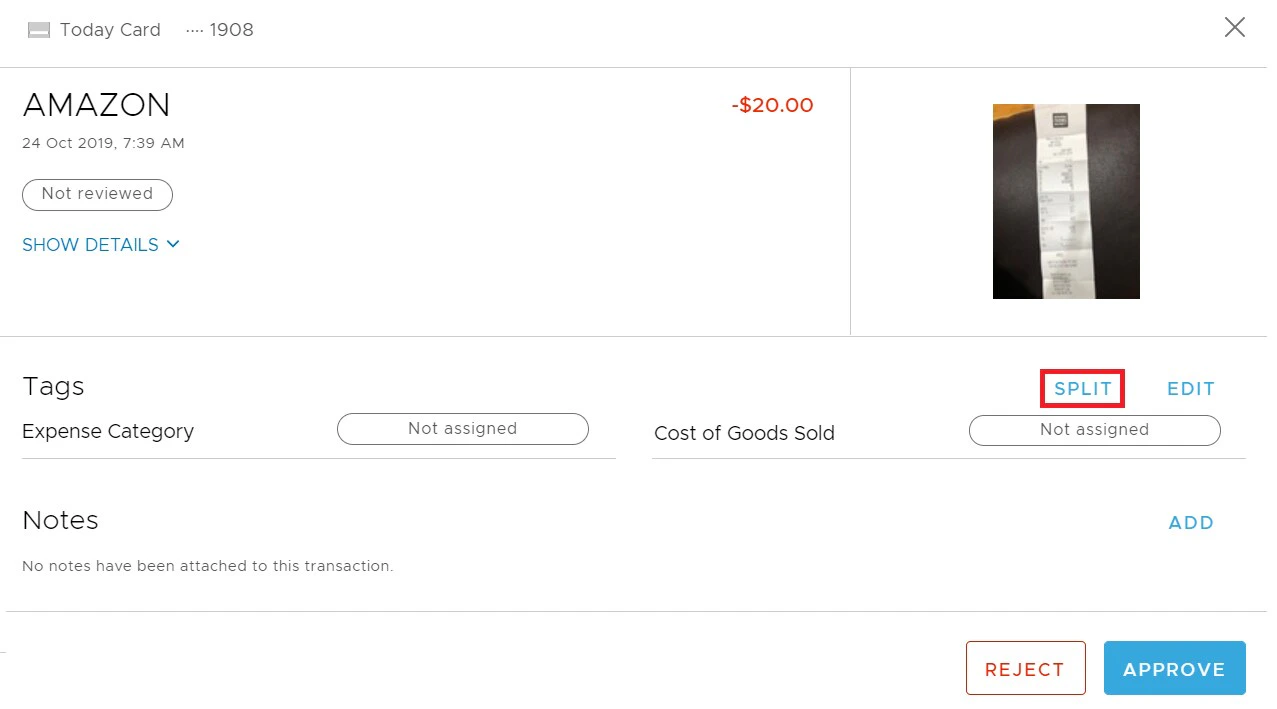
On each transaction, the “Split” option will be visible in the Tags section.  
PEX: How to Use Split Tags
When you click “Split”, the set of tags will be replicated with a 50% split of the transaction amount as default. The transaction can be split multiple times. Users can edit the amount or the percentage allocation for each split. Sum of the all split amounts should match the Transaction amount Click on the “Save” button to save the tags. 
PEX: How to Save Split Tags
You can verify the allocation tag values and the amounts for each allocation. 
PEX: How to Verify Split Tags
Last modified on April 22, 2026