Access App
Create Envelope
View History
FAQ
ACCESS APP
To access the app:- Log in to http://dashboard.pexcard.com/
- Navigate to Apps > Available
- Locate Expense Envelope.
- Click More info > Install > Launch.
CREATE ENVELOPE
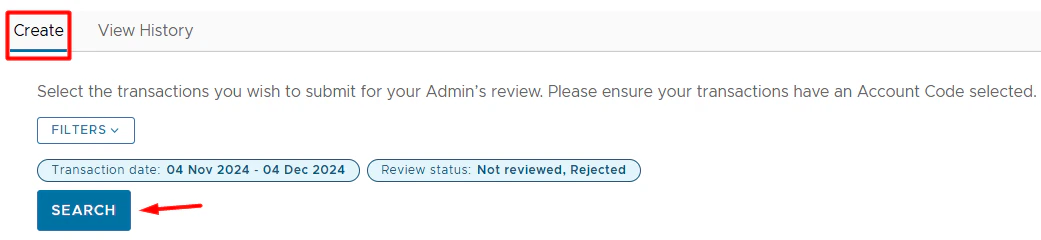
Your Admin has to set up Account Codes prior to you using the app. If you see an error “Set up incomplete. Please contact your admin to set up Account Codes to begin creating expense reports”, share this link with your Admin - Expense Envelopes for Admin — Configure If the set up is complete:Select the transactions you’d like to submit for your Admin’s review. Note: one month and unreviewed and rejected transactions are selected by default.
- Purchase Date - when the transaction was made.
- Merchant Name - where the transaction was made.
- Paper clip - whether or not a receipt was attached to the transaction. No paper clip means no receipt attached.
- Amount - how much the transaction is.
- Account Code - the account corresponding to the transaction.
- Ensure that the account code is selected.
- Click it to update if necessary.
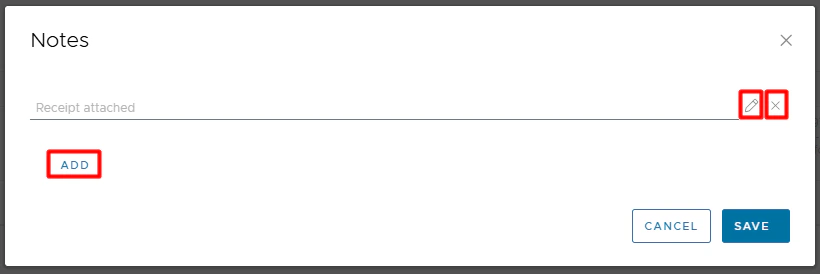
- Notes - any notes on the transaction.
- Click on the pencil icon

- Settled purchases.
- Purchases with a status of Not Reviewed or Rejected.
- New (not exported yet) purchases.
- If your Admin has exported a purchase, it will not show in the list.
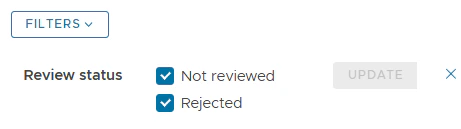
- Review status (Not reviewed; Rejected).
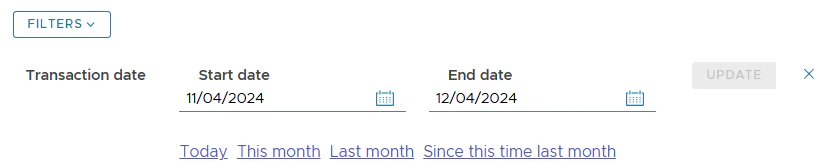
- Transaction date. The limit is up to 1 year. You might use predefined filters: Today, This month, Last month, Since this time last month.


View History

- Export time
- Envelope name
- Status
- Transactions
- Submitted/exported transactions categorized by the status recorded at the time of submission/export.
- Total amount
- Total $ amount of all transactions included in an envelope.

FAQ
I click 'Search' and see an error 'Set up incomplete. Please contact your admin to set up Account Codes to begin creating expense reports'.
I click 'Search' and see an error 'Set up incomplete. Please contact your admin to set up Account Codes to begin creating expense reports'.
**Your Admin has to set up Account Codes so you can begin creating expense reports. If you see this error, share this link with your Admin - Expense Envelopes for Admin — Configure
I can't find my purchase in the transaction table when creating an envelope.
I can't find my purchase in the transaction table when creating an envelope.
To find your purchase, make sure that: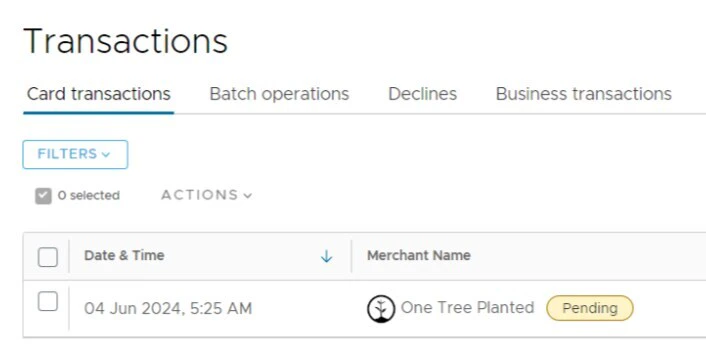
- It meets your search criteria (status, date).
- It either has a receipt attached, a tag added, or both; otherwise, it wouldn’t have a “Not Reviewed” status.
- It is already settled. There is no “Pending” label next to the merchant name.
- It has not been exported yet by Admin.
- Exported purchases will not be shown in the transaction table.
When will I be able to download the envelope?
When will I be able to download the envelope?
Once you submit the envelope, it immediately appears in the View History tab with the status Pending. When your Admin exports some or all transactions from that envelope, the status changes from Pending to Completed, and a download icon appears next to it. Click on the icon to download the file.
Does the export file include all receipts attached to a purchase?
Does the export file include all receipts attached to a purchase?
Yes.
Why aren't all my receipts included in the export file?
Why aren't all my receipts included in the export file?
It is not recommended to export transactions with multi-page PDFs attached as receipts. If you happen to attach a PDF receipt, please ensure that it is a single-page file. If it has more than one page, please take a picture or screenshot of each PDF page and attach those pictures/screenshots to a transaction as PNG or JPG files.
What notes does the export file include?
What notes does the export file include?
It includes all notes—both personal and system-generated.
What tags does the export file include?
What tags does the export file include?
Does the export file include split purchases?
Does the export file include split purchases?
It includes the purchase date, merchant name, amount, and receipts for split purchases. However, it does not show the individual split amounts or their associated tags for now.For any questions, please email appsupport+envelope@pexcard.com