CONFIGURING VENDOR CARD CREATION FOR Sage
1. ACCESSING APP
- Log on to your PEX account on dashboard.pexcard.com.
- Navigate to the “Apps” section in the left-hand side menu.
- Click on “Available” at the top.
- Find the “Connector for Sage Intacct” app. Click on “More info” at the bottom of the app tile.
- Click on the “Install” button at the bottom to install the app. Once installed, click on the “Launch” button, which will launch/open the app. Note: You do not need to download any file to install an app. The connector is web-based.
2. SELECT YOUR USE CASE(S)
There are currently two options for how you can connect PEX with Sage Intacct. We recommend as many as possible to make your reconciliation experience seamless.- Auto create vendor cards from my Sage Intacct vendor list.
- Sync transactions from PEX to Sage Intacct nightly.
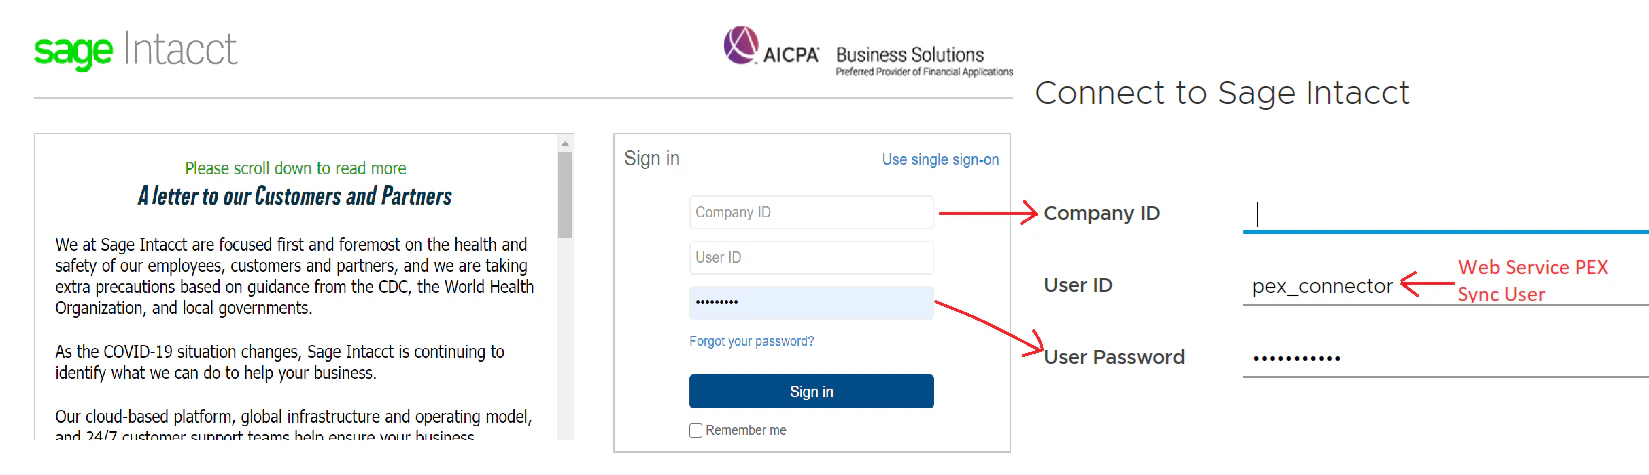
3. CONNECT TO YOUR Sage Intacct ACCOUNT
After you log in to your PEX account, make sure that you are already connected to Sage Intacct.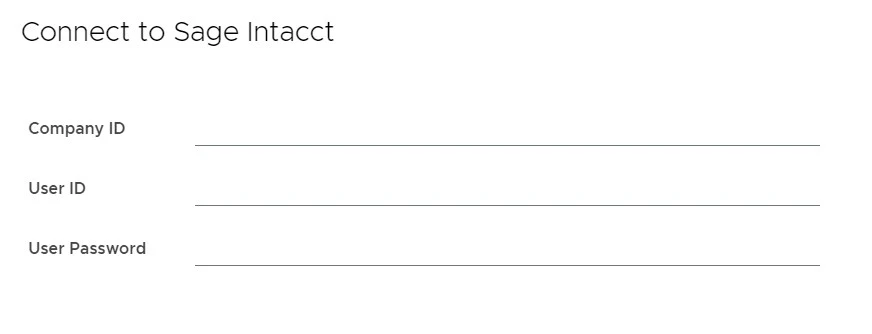
4. SELECT VENDORS TO AUTO CREATE VENDOR CARDS FOR
You will see a list of your top vendors. “A to Z” and “Z to A” are the “Your Sage Intacct vendors” list sorting options. Select a vendor(s) you want to auto create a vendor card(s) for by clicking on a vendor name in the “Your Sage Intacct vendors” list. Use hold cmnd+click (mac) or ctrl/shift+click (win) for multi selection. If you want to select all vendors check the “Select All” button. Note: you can select up to 25 at a time. If you do not see a vendor listed, you can search for and select any vendor that exists in your Sage account. To search, start typing the vendor name in the Search bar of the “Your Sage Intacct vendors” list. If a desired vendor is not in the “Your Sage Intacct vendors” list, then follow this link to a Sage Intacct support article on how to add a vendor to your Sage Intacct account. Once added, this vendor name will be searchable from within PEX. Once you select vendor(s) you want to auto create PEX vendor card(s) for in the “Your Sage vendors” list, click on the right-arrow button to add them to the “Selected vendors” list.To remove a pre-selected vendor from the list, click on the vendor name and the left-arrow button. The vendor will disappear from the “Selected vendors” list and appear again in the “Your Sage vendors” list. To clear the whole “Selected vendors” list, click “Reset”. Note: The system will create vendor cards only for vendors that are in the “Selected vendors” list. To proceed, click “Next”.
5. ADD CARDS DETAILS
On this screen, you will see all vendors that you added to the “Selected vendors” list. You might have 2 options:- Set an auto card funding limit which will come from your PEX Business Balance.
- Turn off auto card funding and add initial funding for that vendor card (available only if you have a PEX Prepaid account). Clicking “Create” will create vendor cards and redirect you to the “Manage vendor cards” tab. All the vendor cards will be activated on creation and can be used immediately.
- The system will book PEX purchases against the corresponding vendors on your created vendor cards.
- If your purchases do not have corresponding vendors, then the system will book PEX purchases against a single vendor.